
In 2024, Fix Apple iPhone 7 Stuck on Data Transfer Verified Solution! | Dr.fone
Fix Apple iPhone 7 Stuck on Data Transfer [Verified Solution!]

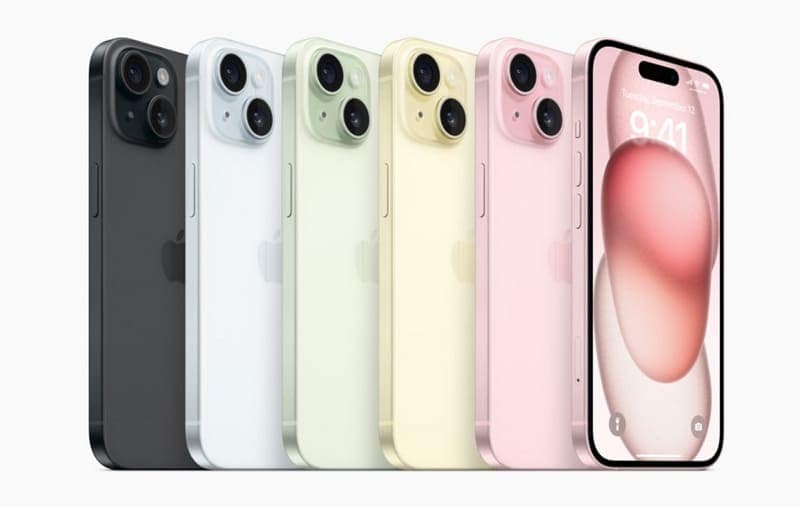
With the release of the new iPhone 15, most iPhone enthusiasts must be looking to shift to the latest version of the Apple iPhone 7 device. If you are among these iPhone lovers, we congratulate you in advance for buying the latest iPhone device out there. However, we also want to warn you about some problems while you try to transfer the data from your old iPhone or Android device.
As the full-fledged sale of the Apple iPhone 7 began, many people faced the Apple iPhone 7 stuck transferring data issues. If you are one of those people, this article will help you identify the problem and provide the best solution to tackle this issue.
Part 1: What Are the Problems Behind Apple iPhone 7 Stuck on Data Transfer
In this section, we will try to identify the root cause of the problem. By understanding the cause of the issue, we can better find a suitable solution to your problem.
1. Bugs in the Move to iOS App
It is possible that the Move to iOS app may cause problems while transferring data from your Apple iPhone 7 to your iPhone 15. This can happen because of two reasons: you haven’t updated the app for a long time, or the updated version has some bugs in it.
2. iTunes/Finder Backup is Corrupted
Sometimes, the backup stored in the iTunes/Finder turns out to be corrupted due to various issues. If you are restoring data from such a corrupted backup, it can cause the Apple iPhone 7 to get stuck while transferring data. You have to identify corrupted backups in order to avoid this issue in your iPhone data process.
3. Poor Wi-Fi Connection
If you are transferring the data to your Apple iPhone 7 using iCloud, you need a good Wi-Fi connection to ensure a smooth process. A slow Wi-Fi connection can stop or delay the data transfer process if your iCloud backup is in 100+ GBs.
4. Problem in the iOS Version
When performing iPhone-to-iPhone data transfer, ensure that both iPhones are free from any iOS bugs. For this purpose, update your older iPhone to the latest iOS version to avoid bugs and glitches. If you are using the iOS 17 Beta version on your old iPhone, it can also cause this issue.
Part 2: The Best Way To Fix Apple iPhone 7 Stuck on Data Transfer
To cater to all these data transfer issues from Android or old iPhone to iPhone 15/15 Pro/15 Plus, we recommend first setting up your Apple iPhone 7 as a new device and then using Wondershare Dr.Fone . This Phone Transfer tool helps you transfer data whenever you want after setting up the new iPhone 15. Moreover, the tool is highly optimized and supports all the old and newest iOS and Android versions, including Android 13 and iOS 17.
It is a single-click data transfer tool that can transfer 12 types of data from iOS to iOS and 8 from Android to iOS. Furthermore, you don’t have to worry about which phone brands this phone transfer app supports because it supports over 8000+ devices, including all iPhone models, Samsung, LG, Huawei, OPPO, Redmi, etc.
Key Features
- •Wondershare Dr.Fone promises to transfer the data within 3 minutes.
- •It doesn’t have the requirement of factory resetting the Apple iPhone 7 for transferring the data.
- •Unlike iTunes/Finder, Wondershare Dr.Fone doesn’t overwrite the data saved on your iPhone 15.
Simplified Guide To Transfer Data From Old Smartphone to New iPhone 15
Following are the straightforward step-by-step instructions you need to follow to transfer from your old iPhone or Android to the new Apple iPhone 7 series model:
- Step 1: Choose the Robust Phone Transfer Tool
Download and install the latest version of Wondershare Dr.Fone from the official website and access the Toolbox. Afterward, click on the Phone Transfer tool and attach your old phone and Apple iPhone 7 with the help of official USB cables.

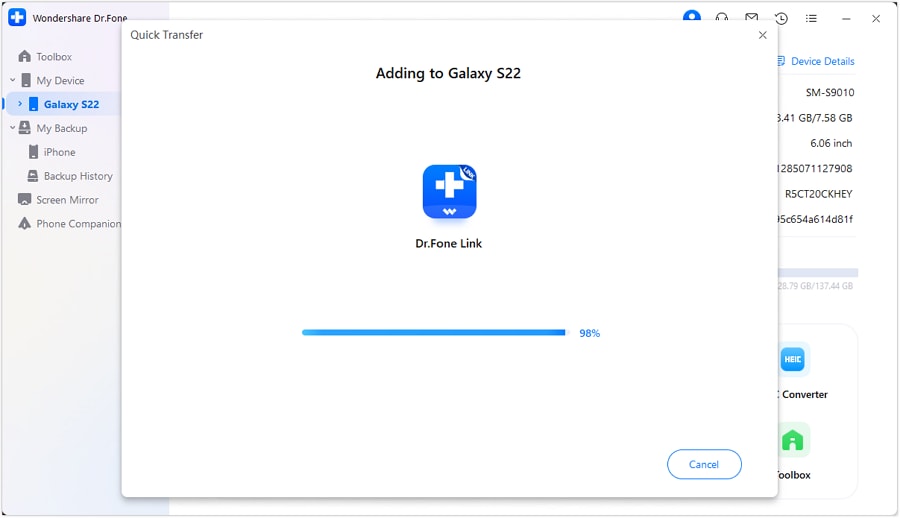
- Step 2: Initiate the Data Transfer Procedure
Wondershare Dr.Fone will automatically detect the positions of your old smartphone and Apple iPhone 7 and assign them the positions. If the positions assigned are incorrect, press the “Flip” option and choose the data you want to transfer to iPhone 15. After this, press the “Start Transfer” button, and the procedure of transferring the data will initiate.

Conclusion
As we have discussed in the article, some initial Apple iPhone 7 users are facing this screen stuck issue while transferring data. As explained in the article, you can avoid this problem by identifying the root cause. If you want a tool to prevent all such issues in the future, we have a perfect all-in-one mobile solution provider for you.
Wondershare Dr.Fone will not only solve this Apple iPhone 7 stuck on data transfer issue but also deal with any future iPhone problem. So, download Wondershare Dr.Fone now to optimize your Apple iPhone 7 using top-notch features.
How to Transfer Everything from Apple iPhone 7 to iPhone
Well, you all know already from experience that transferring to an iPhone device from an Android phone is an uphill task, especially if you have no idea about the right way or the tool you should use. Transferring photos from one device to another one, should be done extra care as you wouldn’t want to lose your beloved memories, right?
Therefore, to transfer photos from Android to iPhone, such as iPhone 15, you will need third-party software, which is easy to access the application as well. Now, both Android and iPhone devices have different operating systems, which make it impossible to do direct transfers.
However, fortunately, there are plenty of high-quality third-party programs that can help you enable Android to iPhone photo transfer. So, start reading the guide below and choose the option that best suits you.
Part 1: How to transfer photos from Android to iPhone including iPhone 15/15 Pro(Max) with Dr.Fone?
If you are confused over which method you should choose for transferring photos from Android to iPhone, then compare the quality and the quickness of the chosen method. Well, to be frank, the tool that qualifies all these criteria is the Dr.Fone toolkit, which is a comprehensive solution that is well designed to tackle all mobile-related issues and tasks.
Dr.Fone is perfect because you can transfer across multiple devices regardless of OS. As an example, if you want to transfer photos from Android to iPad /iPhone and vice versa, it can be done easily by following two ways as mentioned below:

Method 1.1 One-click to Transfer Photos from Android to iPhone using Dr.Fone - Phone Transfer
Dr.Fone - Phone Transfer is a software package that facilitates cross-device transactions such as transferring photos from Android to iPhone. If you are in the process of replacing your Android with a new iPhone, then use Dr.Fone to transfer all contents to the new phone. The content can include photos, contacts, videos, and social media messages.
Dr.Fone - Phone Transfer
Transfer Data from Android to iPhone in 1 Click Directly!
- Cross-platform data shift between any device of your choice from Android and iPhone.
- Support massive data, including images, videos, music, messages, contacts, apps, and more.
- Works perfectly with almost mobile phones and tablets, such as iPhone, iPad, Samsung, Huawei, etc.
- Fully work with mobile system iOS 17 and Android 13 and computer system Windows 10 and Mac 14.
- 100% safe and risk-free, backup & restore data as the original.
3981454 people have downloaded it
Let us see the steps on how to transfer photos from Android to iPhone using Dr.Fone - Phone Transfer.
Step 1. Download and install Dr.Fone - Phone Transfer and launch it. Then select the Switch option from the main interface.
Step 2. Now, connect your Android and iPhone to the computer.
Step 3. As soon as you connect the Apple iPhone 7 device, it will start recognizing it and mentioned it as the ‘Source’ phone or ‘Destination’ phone accordingly. In this case, make sure the Android phone is the Source, and the iPhone is the Destination. You can change their position using the Flip button.

Step 4. Finally, select the files you want to transfer (photos) and click on ‘Start Transfer’.

That was it. Soon, it will transfer pictures from Android to iPhone.
Method 1.2 Selectively Transfer photos from Android to iPhone using Dr.Fone - Phone Manager (Android)
Another way that can assist you in moving photos from Android to iPhone is the Dr.Fone - Phone Manager (Android) . What is incredibly convenient about Dr.Fone - Phone Manager (Android) is its ability to transfer photos selectively. You can also use it to transfer contacts, videos, messages, podcasts, and anything else stored on your Android in minutes. Dr.Fone - Phone Manager (Android) is a secure, trustworthy program. Hence you can be reassured that your information will be kept safe while transferring from one device to another.
Dr.Fone - Phone Manager (Android)
All in one Solution to Transfer Photos from Android to iPhone
- Transfer, backup, edit, export, import & view the data on your phone easily.
- Support multiple data on your phone: music, photos, videos, contacts, SMS, Apps, etc.
- Copy data from one phone to another phone without any data loss.
- Additional features to help you root your device, make gif image, and ringtone.
- Compatible with more than 3,000 Android phones ranging from Samsung to LG, HTC, Huawei, Motorola, Sony, etc.
3981454 people have downloaded it
Here either you can select the photos that you wish to transfer selectively or select all the photos at once. Now, as you wish to transfer photos to an iPhone device, connect your iPhone as the Target phone and then click on the box with the export symbol > Select Export to Device. The name of your iOS device should appear. Click on the Apple iPhone 7 device to start transferring photos.
Part 2: Transfer photos from Android to iPhone including iPhone 15/15 Pro(Max) using Move to iOS App?
Now, to answer how to transfer photos from Android to iPhone, there is another simple solution that you can make use of. It is called the “Move to iOS app,” which you can download freely from the Google Play store.
Note: This solution only works when you set up the iPhone. If the iPhone is already set up, you need to factory reset it and set it up to restore photos with this App.
Now to proceed, first of all, you need to do some settings on your iPhone device as follows:
On your iPhone, go to a screen called ‘Apps & Data’ > choose ‘Move Data from Android’ option.


The next step is to take your Apple iPhone 7 to complete the transfer process with the “Move to iOS” app.
- Switch to your Apple iPhone 7, open Google Play Store, and search for ‘Move to iOS’ app.
- Open the ‘Move to iOS’ app to accept permission requests, install it, and open the app.
- At this point, tap Continue on both your iOS and Android device.

- On your Apple iPhone 7, enter the 12-digit code of the iPhone. This is so that the ‘Move to iOS’ app knows which iOS device it has to transfer the data to.

Before the transfer starts, you will be asked a number of questions, like do you want to transfer Google Account information, Bookmarks, etc. Now, since you only want videos and photos, deselect the other options except ‘Camera Roll’
The above process to transfer pictures from Android to iPhone is good for mobile users who are unwilling to invest money in software. However, the method is not perfect because it is time-consuming. The transaction can neither be done quickly nor can it be done with a single click.
Part 3: How to transfer photos from Android to iPhone using Google Drive?
Google Drive is cloud storage that is available to those who have a Gmail address. It can store anything ranging from Word Documents to photos and videos. Hence, if you are wondering how to move photos from Android to iPhone, then Google Drive is your answer.
To go with the transfer of photos and videos from Android to iPhone with Google Drive, follow the steps outlined below:
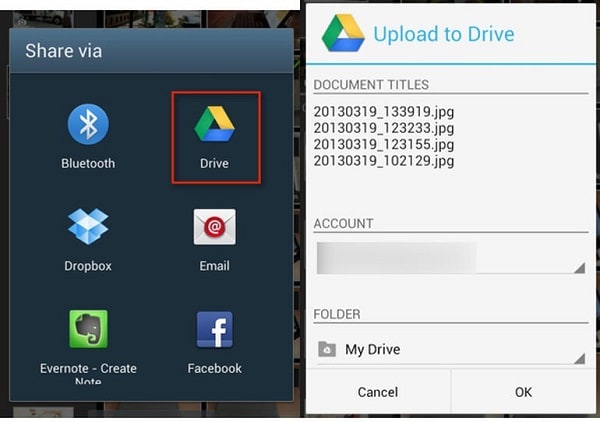
- First, make sure Google Drive is already installed on the Android device. If not, visit the Play Store to download Google drive. Then, on your Apple iPhone 7, visit the Gallery section> select the images> tap on Share button> and finally choose Share via Drive.
- Soon the file will get uploaded.
- Now, move to your iPhone.
- Here, download and install the Google Drive app onto your iPhone.
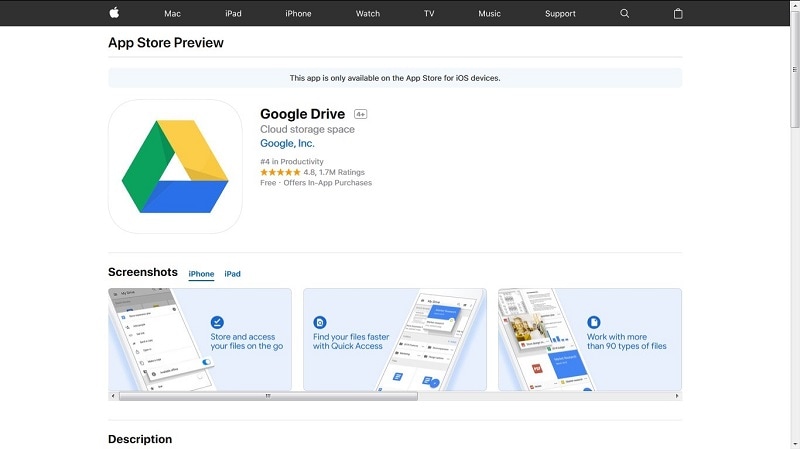
- Open the Drive (you must log in with the same Google ID). There you will see all the uploaded media files (Photos). Now, select ‘Save Image’ or ‘Save Video’ depending on your file type.
Part 4: Top 3 Android to iPhone photo transfer Apps
There are several apps that are specifically designed for storing and transferring images from an Android device to an iPhone. We have found the three best apps based on ease of use and accessibility.
PhotoSync
PhotoSync is a free photo-sharing app available on both Android and iOS devices. The app lets you store all your photos on one device and then transfer it to another device through Wi-Fi. PhotoSync is designed to work with several devices besides Android and iOS devices. It works on different platforms, including desktop computers, NAS, and Cloud Services.
You can extract videos and photos directly from the camera and transfer them to another device. You can even access the photos/videos via a web browser. PhotoSync is regularly updated with features to make the experience better support for RAW files and preserves for EXIF-data.
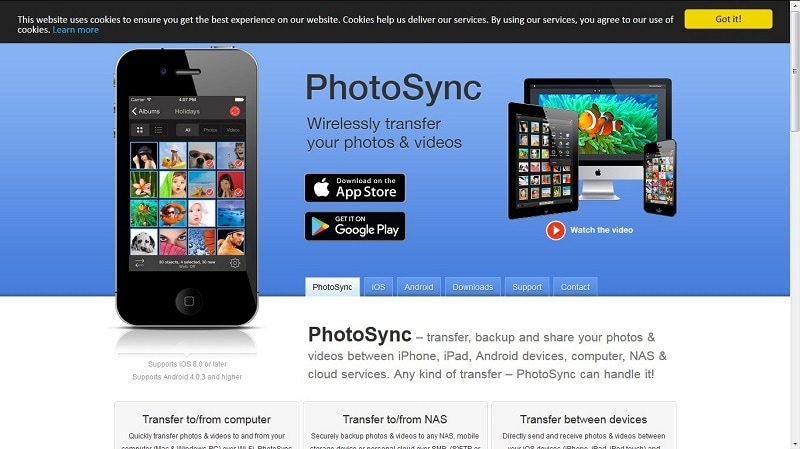
Photo Transfer
The photo transfer app is an incredibly popular app and with a good reason. You can perform Android to iPhone photo transfer without any cables. You can access Photo Transfer on different platforms, including desktop computers. It allows you to access your photos stored on the app via a web browser. You can easily download multiple photos for storage and exchange these photos across multiple platforms. If you are in need of an intuitive, easy to use app transfer photos to iPhone from Android, then consider using the Photo Transfer app.

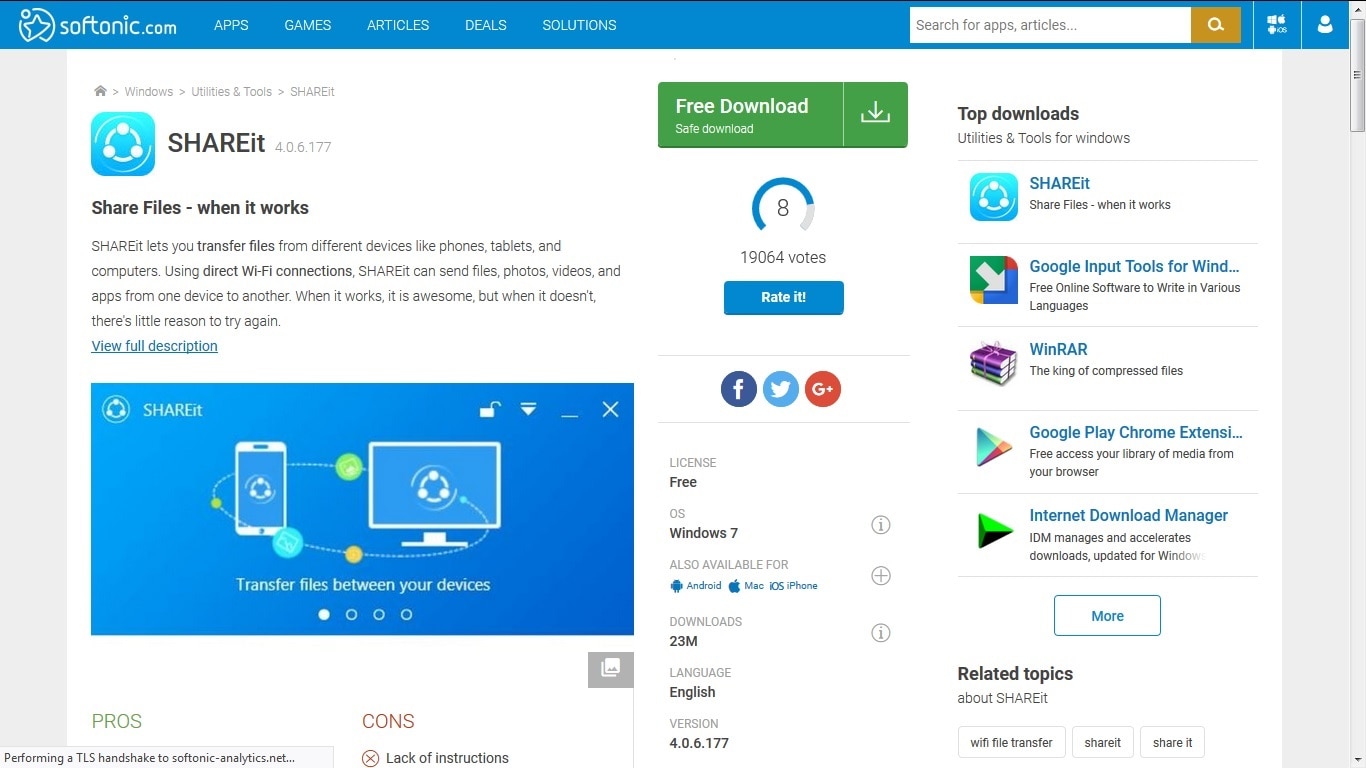
Shareit
Shareit is a special application developed to transfer files between two devices. You can use Shareit to transfer pictures from Android to iPhone in seconds. The software is free and completely secure, so you do not have to worry about how to transfer photos from one device to another. You can share individual photos or entire folders on Shareit. However, it should be noted that sharing folders can make slow down the process.
The best part of Shareit is the freedom allowed to users because you can transfer different file types besides photos. Hence, if you are wondering how to transfer video from Android to iPhone, then Shareit is your answer. The software is constantly being updated to make sure it is safe. Therefore, if users need to transfer more than just photos like sensitive information, they can rest assured about Shareit’s reliability.
Thus, after going through the article, we are sure that you got a wide range of options to choose from to transfer your Apple iPhone 7 photos to the iPhone. Well, every method is good in itself; however, we would like to say that one of the best options for you would be the Dr.Fone tool without a doubt.
4 Ways to Transfer Messages from Apple iPhone 7 to iPhone Including iPhone 15
“Do text messages transfer to the new iPhone from the old iPhone? I have bought a new iPhone but can’t understand how to transfer messages from Apple iPhone 7 to iPhone?”
Lately, we have gotten plenty of feedback like this from users who wish to learn how to transfer messages to new iPhone, like iPhone 15/15 Pro (Max), from an existing iOS device. If you have the same doubts, then you have come to the right place.
While it is quite easy to move music, videos, or pictures from one iPhone to another , you might need to walk an extra mile to transfer contacts or messages. To make it easier for our readers, we have come up with three different techniques to transfer messages from an old to a new iPhone effortlessly.
Read on and learn how to transfer messages from Apple iPhone 7 to iPhone in no time.
Which method to choose?
There are 4 different ways on how to transfer messages to the new iPhone. But which one to choose? Chances are that you might get confused. To make things easier for you, we here provide a quick comparison.
Method 1: How to transfer messages from Apple iPhone 7 to iPhone including iPhone 15/15 Pro (Max) in one click
If you want to learn how to transfer texts from Apple iPhone 7 to iPhone seamlessly, then take the assistance of Dr.Fone toolkit. Simply use Dr.Fone - Phone Transfer to move your messages from one iPhone to another. Not only messages, but you can also use it to transfer all data files to new iPhone .
Dr.Fone - Phone Transfer
Quickly Transfer Text Messages /iMessages from Apple iPhone 7 to iPhone
- Transfer messages from Apple iPhone 7 to iPhone without backup.
- Support any iDevices including iPhone, iPad, and iPod.
- Transfer everything including contacts, music, video, photo, SMS, app data, and more.
- Can be installed both on Win and Mac computers.
3981454 people have downloaded it
In this technique, the simple process goes as follows to transfer messages to new iPhone:
Open software > Connect iPhones to PC > Select “Messages” > Click “Start Transfer”
Now let’s dive in and learn how to transfer messages to new iPhone:
1. Set up Dr.Fone - Phone Transfer to Windows or Mac computer. Connect and start the application with your iPhone. On the home screen, click the “Phone Transfer” option.
2. Confirm that both iPhones have the correct target and source positions. Or to exchange by clicking “Flip”.
3. Choose the type of information to be transferred. Before clicking on the button “Start Transfer” make sure that the option “Text Messages” is enabled.
4. Wait a while for your old iPhone messages to be transferred to the new iPhone.
5. Once it is done, you can disconnect your iPhones from the PC, and view the messages on the target iPhone.

After following these easy steps, you can learn how to transfer texts from Apple iPhone 7 to iPhone with Dr.Fone - Phone Transfer.
Video Guide: How to transfer messages from Apple iPhone 7 to iPhone
You may be interested in:
- _ 4 ways to transfer SMS from Apple iPhone 7 to Android _
- _ 5 Ways to Transfer WhatsApp Messages from Apple iPhone 7 to iPhone _
Method 2: How to Transfer Messages from Apple iPhone 7 to iPhone Including iPhone 15/15 Pro (Max) Using iCloud Backup
Transferring data, including crucial messages, from an old iPhone to a new one is a smooth process using iCloud Backup. It allows you to access your essential conversations and other message data on your new device. Restoring your messages from an iCloud backup is a straightforward process. To effortlessly move your messages from one iPhone to another using an iCloud backup, adhere to the simple steps outlined below:
Step 1: Go to “Settings” on your iPhone, tap your name, and access “iCloud.” Press the “iCloud Backup” option, and on the following screen, ensure “Back Up This iPhone” is enabled. Now, “Back Up Now” to create a backup of your old iPhone’s data, including messages, on iCloud.

Step 2: Afterward, start setting up your new iPhone until you reach the “Apps & Data” screen. Here, choose “Restore from iCloud Backup” and log in using your Apple ID. Then, go on to select the backup you want to restore and complete the process by following the on-screen instructions.

Method 3: How to Transfer Messages from Apple iPhone 7 to iPhone, including iPhone 15/15 Pro (Max), using iCloud Sync
Ensuring a smooth transition to the latest iPhone is made simple with the aid of iCloud sync. It enables the transfer of essential data, including precious messages, from your old device. With it, you can sync your messages and other crucial data to your new device. This allows continued access to your valuable conversations and attachments. Below are the step-by-step instructions for transferring messages using the iCloud sync feature:
Step 1: On your old iPhone, access phone Settings and tap on your Apple ID. Press “iCloud” on the following screen and move to the “Apps Using iCloud” section.

Step 2: Here, tap “Show All” and go on to press “Messages in iCloud” from the list. On the following screen, enable the “Use on this iPhone” feature. It will sync iMessage with your iCloud account, allowing you to access them on your new iPhone.

Method 4: How to transfer messages from Apple iPhone 7 to iPhone including iPhone 15/15 Pro (Max) using iTunes/Finder
Besides iCloud, one can also take the assistance of iTunes/Finder to move their content from one iOS device to another. Not only do text messages transfer to new iPhone, other kinds of data files like photos or contacts can also be moved with this method. To learn how to transfer texts from Apple iPhone 7 to iPhone using iTunes, follow these steps:
1. Connect your source iPhone to your computer and launch iTunes or Finder (Mac Computer).
2. Select the Apple iPhone 7 device and go to its Summary page.
3. Under the Backups section, click on the “Backup Now” button to take a complete backup of your phone. Make sure that you are taking a backup on the computer instead of iCloud.

4. After taking a backup of your device, disconnect it, and connect the target phone to the computer.
5. Launch iTunes/Finder and wait for it to recognize the new iPhone. From here, you can choose to set up your device while restoring a previous backup.

6. Alternatively, you can also go to its “Summary” page and click on the “Restore Backup” option to restore the existing backup on your target device.

This will let you move not just messages, but all the major data files from one iOS device to another.
You may be interested in:
- _ Does iTunes Backup Text Messages? How to Restore? _
- iTunes Not Working? Here Are All Solutions You Need
Now when you know how to transfer messages from Apple iPhone 7 to iPhone in different ways, you can simply pick the preferred option. We have also compared these techniques so that you can go with the most suitable alternative.
Go ahead and follow this stepwise tutorial to transfer your messages from one iPhone to another. Whenever someone asks “do text messages transfer to the new iPhone,” make them familiar with an easy solution by sharing this informative post.
Also read:
- [New] Ultimate Guide to Macro Videography Techniques
- [Updated] Complete Guide Timer Addition to Video Broadcast Platforms
- [Updated] Leading Techniques for YouTube MPEG Migration
- 2024 Approved Top 15 Audio Collections Matching Melodies with Every Type of Visual Narrative
- 4 Quick Ways to Transfer Contacts from Apple iPhone 12 Pro to iPhone With/Without iTunes | Dr.fone
- 4 Ways to Sync Contacts from Apple iPhone 7 Plus to iPad Easily | Dr.fone
- Dialogue Titles: Pitting Google's Translation Against AI
- How to Copy Contacts from Apple iPhone 13 mini to SIM? | Dr.fone
- How to Transfer Photos from Apple iPhone 14 to other iPhone without iCloud | Dr.fone
- In 2024, How to Copy Contacts from Apple iPhone SE to SIM? | Dr.fone
- Methods to Transfer from Apple iPhone 7 to Android | Dr.fone
- Transforma Imágenes a Color: Guía Fácil De Tres Etapas Para Cambiar Fotografías en Blanco Y Negro
- Updated 8 Stunning Movie Creator for Mac for 2024
- Upgrade Your Experience with the New iPhone 15 - Apple's Invitation [iPhone 15] | ZDNet
- Title: In 2024, Fix Apple iPhone 7 Stuck on Data Transfer Verified Solution! | Dr.fone
- Author: Charlotte
- Created at : 2024-10-05 07:22:55
- Updated at : 2024-10-12 10:13:53
- Link: https://iphone-transfer.techidaily.com/in-2024-fix-apple-iphone-7-stuck-on-data-transfer-verified-solution-drfone-by-drfone-transfer-from-ios/
- License: This work is licensed under CC BY-NC-SA 4.0.