
In 2024, 4 Quick Ways to Transfer Contacts from Apple iPhone 13 to iPhone With/Without iTunes | Dr.fone
4 Quick Ways to Transfer Contacts from Apple iPhone 13 to iPhone With/Without iTunes
“How to transfer contacts from Apple iPhone 13 to iPhone without using iTunes? I have got a new iPhone, but can’t seem to transfer contacts from Apple iPhone 13 to iPhone without iTunes.”
Lately, we have got plenty of queries like this from our readers who like to learn how to transfer contacts from Apple iPhone 13 to iPhone, such as iPhone 12/ 12 Pro (Max)/ 12 Mimi without iTunes. After all, when we get a new iPhone, this is the first thing that comes to our mind. If you are also going through the same dilemma, don’t worry as we have a perfect solution. This post will teach you how to transfer contacts from Apple iPhone 13 to iPhone without iTunes and transfer contacts with iTunes.
Part 1: Transfer Contacts from Apple iPhone 13 to iPhone Including iPhone 12/ 12 Pro (Max)/ 12 Mini with iTunes
To start with, let’s learn how to transfer contacts from Apple iPhone 13 to iPhone using iTunes. If you have an updated version of iTunes, you can transfer and sync your data between various devices. Ideally, you can either sync your contacts or backup and restore them. We have discussed both of these techniques to transfer contacts from Apple iPhone 13 to iPhone with iTunes.
Method 1: Backup and Restore iPhone contacts with iTunes
This is the easiest approach to learn how to transfer contacts from Apple iPhone 13 to iPhone with iTunes. In this, we will first take a backup of our old phone (including contacts) and later restore the backup to a new device. Needless to say, all the existing data on the target device would be erased, and with your contacts, the entire backup will be restored.
- 1. Firstly, connect your existing iPhone to your system and launch iTunes.
- 2. Select your device and visit its Summary section.
- 3. Under the Backups section, choose to take a backup on the local computer.
- 4. In the end, click on the “Backup Now” button and wait for iTunes to backup your device entirely.

- 5. Once you have taken a backup locally, you can connect the target device and go to its Summary.
- 6. From here, click on the “Restore Backup” and select the target backup and device.

In this way, your entire backup (including contacts) would be restored, and you can transfer contacts from Apple iPhone 13 to iPhone with iTunes.
Method 2: Sync Contacts with iTunes
If you only wish to transfer your contacts, then it can be achieved by syncing your device. To learn how to transfer contacts from Apple iPhone 13 to iPhone using iTunes, follow these steps:
- 1. Firstly, connect your existing iPhone to your system and launch an updated version of iTunes.
- 2. Select the Apple iPhone 13 device and go to its “Info” tab. From here, enable the option of “Sync Contacts”. You can either select all contacts or selected groups.
- 3. After making your selection, click on the Sync button and wait for it to complete the process.

- 4. Now, disconnect the Apple iPhone 13 device and connect your target iPhone to it.
- 5. Follow the same drill, go to its Info tab, and enable the option to “Sync Contacts”.
- 6. Additionally, you can visit its Advanced section and replace the old contacts with the new ones as well.
- 7. Once you have selected the option, click on the “Sync” button.

In this way, you would be able to learn how to transfer contacts from Apple iPhone 13 to iPhone with iTunes easily.
Part 2: 1-Click to transfer contacts from Apple iPhone 13 to iPhone, Including iPhone 12/ 12 Pro (Max)/ 12 Mini without iTunes
As you can see, learning how to transfer contacts from Apple iPhone 13 to iPhone using iTunes can be a little complicated. Therefore, we recommend using trying Dr.Fone - Phone Transfer . It provides a one-click solution to transfer the data of your choice from one device to another. The tool comes with an intuitive process and has a free trial as well. It is compatible with every leading iOS device (including devices running on iOS 14).
Besides transferring your contacts, you can also move other data files like photos, videos, calendars, messages, music, etc. It can also transfer data between different platforms (like Android to iOS, iOS to Windows, and more). To learn how to transfer contacts from Apple iPhone 13 to iPhone without iTunes, follow these steps:
Dr.Fone - Phone Transfer
1-Click to Transfer Contacts from Apple iPhone 13 to iPhone without iTunes
- Easy, fast, and safe.
- Move data between devices with different operating systems, i.e., iOS to Android.
- Supports iOS devices that run the latest iOS

- Transfer photos, text messages, contacts, notes, and many other file types.
- Supports over 8000+ Android devices. Works for all models of iPhone, iPad, and iPod.

4,777,470 people have downloaded it
- 1. To start with, launch Dr.Fone and select the option of “Phone Transfer” from its welcome screen.

- 2. Now, connect the source and the target iOS device to your system and wait for them to be detected.
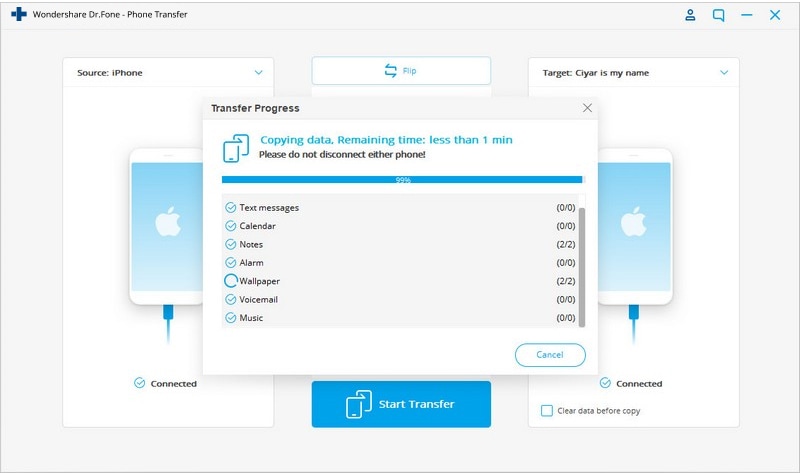
- 3. Dr.Fone - Phone Transfer follows an intuitive process and automatically lists the Apple iPhone 13 devices as Source and Destination. Though, you can click on the “Flip” button to exchange their positions.

- 4. Now, select the type of data you wish to transfer. For instance, if you want to move only contacts, select “Contacts” and click on the “Start Transfer” button. Additionally, you can select the option of “Clear data before copy” and delete the existing data on the target iPhone.
- 5. This will initiate the process and start the transfer process. You can view the progress from the on-screen indicator. Make sure that both the Apple iPhone 13 devices are connected at this stage.
- 6. Once the process is complete, you will be notified. In the end, you can safely remove both the Apple iPhone 13 devices and use them the way you like.

Here is the video tutorial for you:
Part 3: Transfer iPhone contacts to iPhone Including iPhone 12/ 12 Pro (Max)/ 12 Mini without iTunes using Gmail
As you can see, Dr.Fone Phone Transfer provides a one-click solution to transfer your data from one iPhone to another. Though, if you want to try another option, then you can take the assistance of Gmail. Even though this is a more cumbersome process, it will meet your basic requirements. To learn how to transfer contacts from Apple iPhone 13 to iPhone without iTunes, you can try this approach.
- 1. If you are not using Gmail on your device, go to the Accounts settings and log in to your Gmail.
- 2. Afterwards, go to the Apple iPhone 13 device’s Settings > Mail, Contacts, Calendar > Gmail and turn on the option of Contacts.

- 3. Now, you can follow the same drill on the target device and sync your Gmail contacts.
- 4. Alternatively, you can visit your Gmail account on your desktop and go to its Contacts.
- 5. Select the contacts you wish to transfer and click on the “Export” button.

- 6. Choose to export your contacts to a vCard format. Once a vCard is created, you can manually move it to the target iPhone to import contacts from it.

Part 4: Transfer Contacts from Apple iPhone 13 to iPhone Including iPhone 12/ 12 Pro (Max)/ 12 Mini without iTunes using Bluetooth
If nothing else would work, you can transfer contacts from one iPhone to another using Bluetooth. It might be time-consuming, but it is also one of the easiest ways to learn how to transfer contacts from Apple iPhone 13 to iPhone without iTunes.
- 1. Turn on Bluetooth on both devices and make sure they are nearby.
- 2. You can always go to the Bluetooth settings of the source device and pair both devices.

- 3. Now, go to its Contacts and select the ones you wish to transfer.
- 4. Tap on the Share button and select the target device from the list of options.

- 5. Accept the incoming data on the target iPhone to complete the process.
After following these steps, you can learn how to transfer contacts from Apple iPhone 13 to iPhone with iTunes and without it. Besides these methods, you can also AirDrop the contacts or sync them via iCloud as well. As you can see, there are numerous ways to transfer contacts from Apple iPhone 13 to iPhone with iTunes (and without it) that you can try. We recommend Dr.Fone Phone Transfer as it is one of the easiest and fastest ways to transfer data between different devices.
4 Ways to Transfer Messages from Apple iPhone 13 to iPhone Including iPhone 15
“Do text messages transfer to the new iPhone from the old iPhone? I have bought a new iPhone but can’t understand how to transfer messages from Apple iPhone 13 to iPhone?”
Lately, we have gotten plenty of feedback like this from users who wish to learn how to transfer messages to new iPhone, like iPhone 15/15 Pro (Max), from an existing iOS device. If you have the same doubts, then you have come to the right place.
While it is quite easy to move music, videos, or pictures from one iPhone to another , you might need to walk an extra mile to transfer contacts or messages. To make it easier for our readers, we have come up with three different techniques to transfer messages from an old to a new iPhone effortlessly.
Read on and learn how to transfer messages from Apple iPhone 13 to iPhone in no time.
Which method to choose?
There are 4 different ways on how to transfer messages to the new iPhone. But which one to choose? Chances are that you might get confused. To make things easier for you, we here provide a quick comparison.
Method 1: How to transfer messages from Apple iPhone 13 to iPhone including iPhone 15/15 Pro (Max) in one click
If you want to learn how to transfer texts from Apple iPhone 13 to iPhone seamlessly, then take the assistance of Dr.Fone toolkit. Simply use Dr.Fone - Phone Transfer to move your messages from one iPhone to another. Not only messages, but you can also use it to transfer all data files to new iPhone .
Dr.Fone - Phone Transfer
Quickly Transfer Text Messages /iMessages from Apple iPhone 13 to iPhone
- Transfer messages from Apple iPhone 13 to iPhone without backup.
- Support any iDevices including iPhone, iPad, and iPod.
- Transfer everything including contacts, music, video, photo, SMS, app data, and more.
- Can be installed both on Win and Mac computers.
3981454 people have downloaded it
In this technique, the simple process goes as follows to transfer messages to new iPhone:
Open software > Connect iPhones to PC > Select “Messages” > Click “Start Transfer”
Now let’s dive in and learn how to transfer messages to new iPhone:
1. Set up Dr.Fone - Phone Transfer to Windows or Mac computer. Connect and start the application with your iPhone. On the home screen, click the “Phone Transfer” option.
2. Confirm that both iPhones have the correct target and source positions. Or to exchange by clicking “Flip”.

3. Choose the type of information to be transferred. Before clicking on the button “Start Transfer” make sure that the option “Text Messages” is enabled.
4. Wait a while for your old iPhone messages to be transferred to the new iPhone.

5. Once it is done, you can disconnect your iPhones from the PC, and view the messages on the target iPhone.

After following these easy steps, you can learn how to transfer texts from Apple iPhone 13 to iPhone with Dr.Fone - Phone Transfer.
Video Guide: How to transfer messages from Apple iPhone 13 to iPhone
You may be interested in:
- _ 4 ways to transfer SMS from Apple iPhone 13 to Android _
- _ 5 Ways to Transfer WhatsApp Messages from Apple iPhone 13 to iPhone _
Method 2: How to Transfer Messages from Apple iPhone 13 to iPhone Including iPhone 15/15 Pro (Max) Using iCloud Backup
Transferring data, including crucial messages, from an old iPhone to a new one is a smooth process using iCloud Backup. It allows you to access your essential conversations and other message data on your new device. Restoring your messages from an iCloud backup is a straightforward process. To effortlessly move your messages from one iPhone to another using an iCloud backup, adhere to the simple steps outlined below:
Step 1: Go to “Settings” on your iPhone, tap your name, and access “iCloud.” Press the “iCloud Backup” option, and on the following screen, ensure “Back Up This iPhone” is enabled. Now, “Back Up Now” to create a backup of your old iPhone’s data, including messages, on iCloud.

Step 2: Afterward, start setting up your new iPhone until you reach the “Apps & Data” screen. Here, choose “Restore from iCloud Backup” and log in using your Apple ID. Then, go on to select the backup you want to restore and complete the process by following the on-screen instructions.

Method 3: How to Transfer Messages from Apple iPhone 13 to iPhone, including iPhone 15/15 Pro (Max), using iCloud Sync
Ensuring a smooth transition to the latest iPhone is made simple with the aid of iCloud sync. It enables the transfer of essential data, including precious messages, from your old device. With it, you can sync your messages and other crucial data to your new device. This allows continued access to your valuable conversations and attachments. Below are the step-by-step instructions for transferring messages using the iCloud sync feature:
Step 1: On your old iPhone, access phone Settings and tap on your Apple ID. Press “iCloud” on the following screen and move to the “Apps Using iCloud” section.

Step 2: Here, tap “Show All” and go on to press “Messages in iCloud” from the list. On the following screen, enable the “Use on this iPhone” feature. It will sync iMessage with your iCloud account, allowing you to access them on your new iPhone.

Method 4: How to transfer messages from Apple iPhone 13 to iPhone including iPhone 15/15 Pro (Max) using iTunes/Finder
Besides iCloud, one can also take the assistance of iTunes/Finder to move their content from one iOS device to another. Not only do text messages transfer to new iPhone, other kinds of data files like photos or contacts can also be moved with this method. To learn how to transfer texts from Apple iPhone 13 to iPhone using iTunes, follow these steps:
1. Connect your source iPhone to your computer and launch iTunes or Finder (Mac Computer).
2. Select the Apple iPhone 13 device and go to its Summary page.
3. Under the Backups section, click on the “Backup Now” button to take a complete backup of your phone. Make sure that you are taking a backup on the computer instead of iCloud.

4. After taking a backup of your device, disconnect it, and connect the target phone to the computer.
5. Launch iTunes/Finder and wait for it to recognize the new iPhone. From here, you can choose to set up your device while restoring a previous backup.

6. Alternatively, you can also go to its “Summary” page and click on the “Restore Backup” option to restore the existing backup on your target device.

This will let you move not just messages, but all the major data files from one iOS device to another.
You may be interested in:
- _ Does iTunes Backup Text Messages? How to Restore? _
- iTunes Not Working? Here Are All Solutions You Need
Now when you know how to transfer messages from Apple iPhone 13 to iPhone in different ways, you can simply pick the preferred option. We have also compared these techniques so that you can go with the most suitable alternative.
Go ahead and follow this stepwise tutorial to transfer your messages from one iPhone to another. Whenever someone asks “do text messages transfer to the new iPhone,” make them familiar with an easy solution by sharing this informative post.
5 Easy Ways to Transfer Contacts from Apple iPhone 13 to Android
Whenever we move from one device to another, the first thing that we wish to do is transfer our contacts. After all, we can’t communicate with anyone without our list of contacts. Surprisingly, a lot of people find it hard to transfer contacts from Apple iPhone 13 to Android. Truth to be told - there can find countless ways to move contacts from Apple iPhone 13 to Android. You don’t need to worry a lot about the compatibility issues of different systems and can replace old phones at will when there is a new phone release, like the upcoming Samsung Galaxy S22 series. You can use a third-party app, a cloud service (like iCloud), and iTunes. Read on to learn how to transfer contacts from Apple iPhone 13 to Android in 5 different ways.
Part 1: Transfer all contacts from Apple iPhone 13 to Android in 1 click
The easiest way to transfer all the iPhone contacts to Android is by using Dr.Fone - Phone Transfer . A part of the Dr.Fone toolkit can easily transfer all your data from one device to another with a single click. The application is compatible with every leading Android and iPhone model. You can transfer your data from Apple iPhone 13 to Android and vice-versa. Besides a cross-platform transfer of data, iPhone to iPhone and Android to Android transfer is also supported.
The application also supports transferring all the leading data types such as videos, music, photos, messages, and so much more. Extremely easy to use, it is a must-have tool for every smartphone user out there. To learn how to move contacts from Apple iPhone 13 to Android, you can take these steps:
Step 1. First of all, launch the Dr.Fone toolkit on your Mac or Windows PC, and from its welcome screen, visit the “Phone Transfer” module.
Step 2. Connect your Android and iOS devices to the system and let the application detect them automatically. Since you wish to export iPhone contacts to Android, iPhone should be the source while Android should be the destination device. You can use the Flip button to interchange their positions.
Step 3. select the category of data you wish to transfer. Once you have checked the “Contacts” option, click on the “Start Transfer” button to start the process.
Step 4. Sit back and wait for a couple of minutes as the application syncs contacts from Apple iPhone 13 to Android. Make sure that both the Apple iPhone 13 devices are kept connected to the system until the process is completed.
Step 5. Once the transfer completes, you will be shown a message. In the end, you can remove the 2 devices safely from your system.
Part 2: Move contacts from Apple iPhone 13 to Android with Google Account
Another fast and hassle-free way to sync contacts from Apple iPhone 13 to Android is by using your Google Account. Since you can add your Google account on the iPhone, you can also use it to sync your contacts. While setting up your Android, you can use the same Google account. To learn how to import contacts from Apple iPhone 13 to Android using your Google account, these quick steps can be implemented.
Step 1. Unlock your iPhone and go to its Settings > Mail, Contacts, Calendars > Add Account and tap on “Google.”

Step 2. Sign in with your Google account credentials and grant your phone the needed permissions to access your Gmail data.
Step 3. Now, you can go back to your Google account from here and turn on the sync option for “Contacts.”

Step 4. Once your contacts are synced with your Google account, you can easily access them on any Android device. You can use the Google Contacts app or use the same account to set up your device for auto-sync contacts.
Part 3: Import contacts from Apple iPhone 13 to Android with iCloud
Another simple way to sync contacts from Apple iPhone 13 to Android is by using iCloud. Firstly, you need to sync the iPhone contacts with iCloud, and later you can export them a VCF file. To this end, the vCard can be imported to Google Contacts. Yes - it does sound a bit complicated. After all, the Dr.Fone tools provide such a hassle-free way to move contacts from Apple iPhone 13 to Android compared to this technique. Though, this is a free solution and can be your plan B. To learn how to transfer contacts from Apple iPhone 13 to Android via iCloud, follow these steps.
1. Before you proceed, make sure your iPhone contacts are synced with iCloud. To do this, go to the iCloud settings and turn on the sync for 1.Contacts.
2. Great! Once your contacts are synced with iCloud, you can easily access them remotely. Go to iCloud.com and log in with your Apple ID.
3. After logging in to your iCloud account, go to the “Contacts” option from the home screen.
4. This will display a list of all the synced contacts. Select the contacts you wish to move. To select all contacts, click on the gear icon (settings) at the bottom right corner.
5. Once you have made the desired selections, go to its settings again (the gear icon) and choose “Export vCard.” This will save a VCF file having all the contact details.
6. Now, go to Gmail and login with your account details. Select the Contacts option. Alternatively, you can go to the official website of Google Contacts as well.
7. From here, you can choose to Import a file. Click on the vCard option and browse the saved VCF file that you have just exported from iCloud.
8. Once you have imported these contacts to your Google account, you can easily access them on the connected device as well.
Part 4: Copy contacts from Apple iPhone 13 to Android using iTunes
If you are an avid user of iTunes, you can try this technique to export iPhone contacts to Android. Earlier, iTunes has a feature to sync contacts with Google, Outlook, and Windows account. Now, the Google feature has been removed from iTunes. Therefore, you first need to sync your contacts to your Windows account and can later export them into a card. Needless to say, the technique can also be a bit complicated. Though, you can implement these steps to copy contacts from Apple iPhone 13 to Android using iTunes.
1. Launch the latest version of iTunes from your system, and connect your iPhone with a cable.
2. Select your connected device and go to its Info tab. Enable the “Sync Contacts“ option and choose to sync them with Windows Contacts.
3. Ensure that you choose to sync “All Contacts” before clicking on the “Apply” button.
4. Great! Once you have synced your iPhone contacts to your Windows account, you can safely remove the Apple iPhone 13 device. Go to your Account > Contacts and click on the “Export” button on the toolbar.
5. Choose to export the contacts to a vCard and select the location to save the VCF file.

6. In the end, you can manually copy the VCF file to your Apple iPhone 13 or import it to your Google Contacts as well.
Part 5: Switch contacts from Apple iPhone 13 to Android without a computer
Often, users don’t wish to use a computer to export iPhone contacts to Android. If you have the same requirements, then you can use a data transfer app. While there are many apps out there that can help you move contacts from Apple iPhone 13 to Android, I would recommend My Contacts Backup. This is because the app is available on both iOS App Store and Google Play Store . To use this app to transfer contacts from Apple iPhone 13 to Android, follow these steps.
1. Firstly, download the My Contacts app on your iPhone and launch it. Grant the app the needed permissions to access your contacts.
2. The app will automatically detect all the contacts saved on your device and would give you an option to either mail them or save them to its server.
3. You can choose to email the contacts to your own Gmail account as well. A VCF file will be mailed to your account that can later be downloaded and synced.

4. Additionally, you can also upload the contacts to its server.
5. Now, you have to install the My Contacts Backup app on your Apple iPhone 13 and Google Play Store.
6. Launch the app and choose to restore your contacts using an in-app vCard. In this way, all the saved contacts will be exported to your Apple iPhone 13.

Now that you have learned 7 different ways to move contacts from Apple iPhone 13 to Android, you can easily fulfill your requirements. Out of all the 8 provided options, Dr.Fone - Phone Transfer is the fastest and most convenient option to move all the contacts at once.
Also read:
- [New] 2024 Approved Turn the Clock Back Reverse Video Mastery in Instagram
- [New] Face-Editing Battle Is Hero Series Better Than The Cube for 2024
- [New] The Ultimate Compilation Budget-Friendly Editing Tools
- [Updated] Optimize iPhone/Android Video Quality in Online Platforms
- Beginner's Guide to Essential Russian Salutations & Vocabulranium: Navigating a New World of Social Interactions and Expressions in Latin America
- Bricked Your OnePlus Open? Heres A Full Solution | Dr.fone
- Century: Age of Ashes PC Version - Fixed! No More Crashing Issues
- Fixing a Non-Functional Corsair HS35 Microphone on Windows: A Step-by-Step Guide
- Fixing Audio-Only YouTube Videos in Chrome/Firefox - Troubleshooting Steps
- In 2024, On/Off Switch Windows 11'S Auto-HDR Feature
- Resolving PC Malfunctions in Football Manager 2021 - Expert Tips for Gamers
- Step-by-Step Guide: Integrating an MS Excel Spreadsheet Into Your Website
- Troubleshooting Diablo 3: How to Handle Persistent Application Crashes
- Title: In 2024, 4 Quick Ways to Transfer Contacts from Apple iPhone 13 to iPhone With/Without iTunes | Dr.fone
- Author: Charlotte
- Created at : 2024-10-18 21:21:53
- Updated at : 2024-10-23 23:02:11
- Link: https://iphone-transfer.techidaily.com/in-2024-4-quick-ways-to-transfer-contacts-from-apple-iphone-13-to-iphone-withwithout-itunes-drfone-by-drfone-transfer-from-ios/
- License: This work is licensed under CC BY-NC-SA 4.0.