
How to Transfer/Sync Notes from Apple iPhone XS to iPad | Dr.fone
How to Transfer/Sync Notes from Apple iPhone XS to iPad
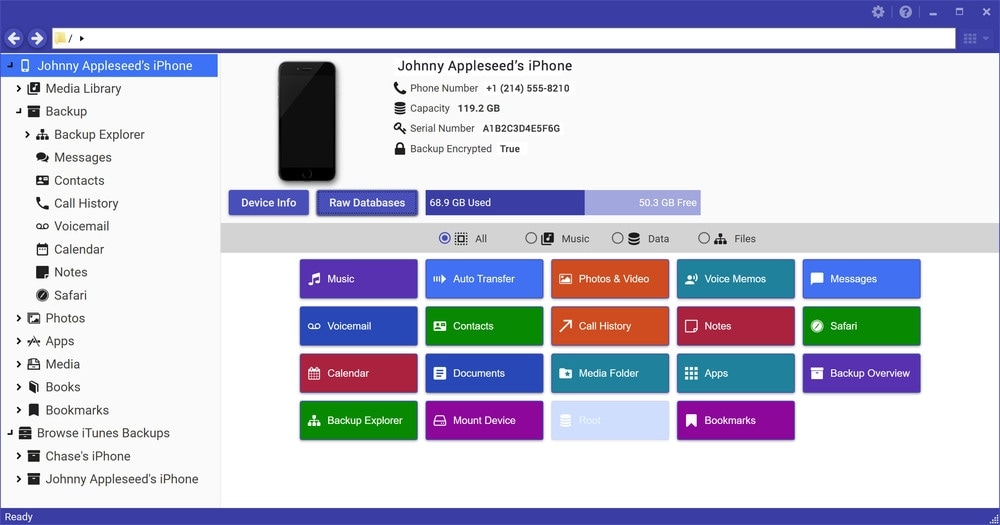
The Notes app comes pre-installed on iPhone and iPad, and it proves to be very handy and useful when you need to jot down some ideas, details, plans, or any other important information which can be reviewed whenever you need. Sometimes you will need more to check your note from your iPhone on iPad. In this case, transferring/syncing notes from Apple iPhone XS to iPad plays an important role. This article will provide the ways with and without iCloud to transfer notes from Apple iPhone XS to iPad in detail.
Part 1. Transfer Notes from Apple iPhone XS to iPad Using iCloud
This part will introduce how to transfer iPhone notes to iPad with iCloud. In fact, this is very easy to be done, and you’ll only need several simple steps. Check it out.
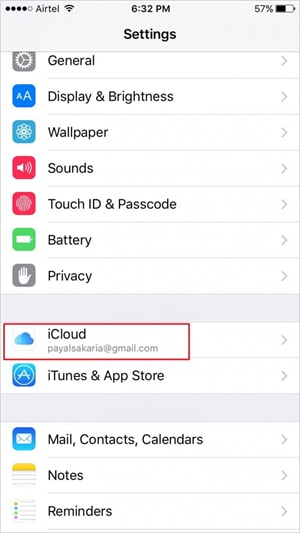
Step 1 Open Settings and select iCloud
Tap Settings > iCloud on both your iPhone and iPad.
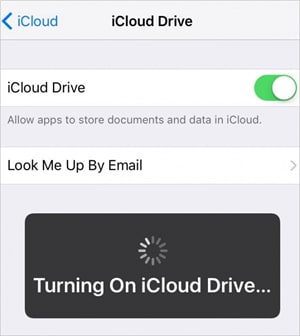
Step 2 Turn on iCloud Drive
Click on iCloud Drive option and then turn it on. You need to turn the option on both your iPhone and iPad.
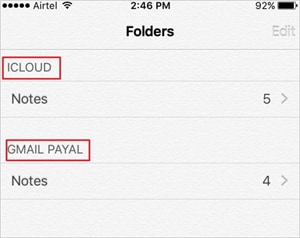
Step 3 Go to Notes App on iPhone
Now go to the Notes app on your iPhone, and you can see a folder named iCloud. Now you can create notes in the iCloud folder on your iPhone, and the notes will be automatically synced to the iPad when the two devices are connected with Wi-Fi connection.
Part 2. Sync Notes from Apple iPhone XS to iPad Using Third-Party Software
Dr.Fone - Phone Manager (iOS)
Transfer Files Between iPhone and iPad without iTunes
- Transfer, manage, export/import your music, photos, videos, contacts, SMS, Apps, etc.
- Back up your music, photos, videos, contacts, SMS, Apps, etc. to the computer and restore them easily.
- Transfer music, photos, videos, contacts, messages, etc from one smartphone to another.
- Transfer media files between iOS devices and iTunes.
- Fully compatible with the latest iOS version and iPod.
3981454 people have downloaded it
Besides iCloud, there are several third-party softwares that also allow you to sync and transfer notes from Apple iPhone XS to iPad. This part will introduce the top programs which can help you to get the work done easily.
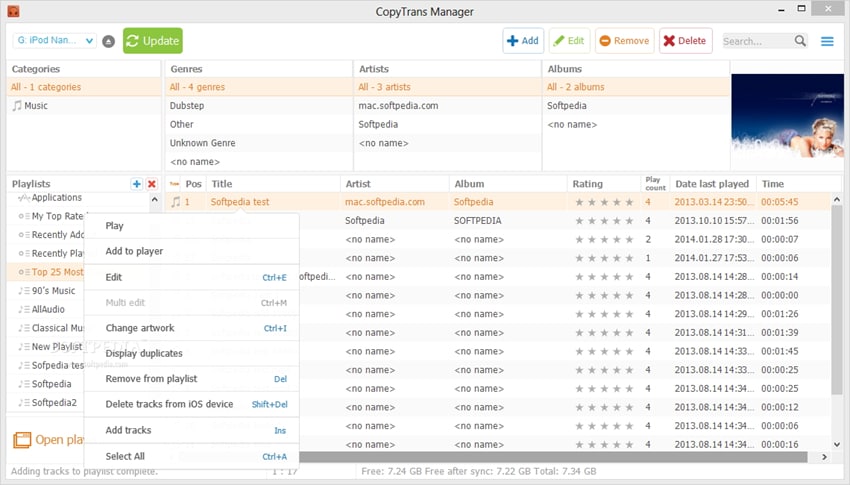
1. CopyTrans
It allows you to transfer apps, notes, photos, videos, and other content between iOS devices, PC, and iTunes. The software also takes backup of data so that it can be restored in case of data loss. CopyTrans also enables you to import the artwork, playlist, and other information into iTunes.
Pros
- Easy-to-use and clean interface
- Provides the option to take back up iOS data
- The app provides multiple guides and tips for the users
Cons
- The time of transfer is long
- Many users have also complained about detecting virus
User reviews
- Thousands of songs can be copied back to iTunes in minutes
- Virus detected by windows 10. Windows 10 detected a virus and removed the download 2x. Never unzipped the file.
2. iExplorer
This is another app that allows you to sync notes from Apple iPhone XS to iPad. The app allows you to transfer images, music, notes, SMS and all other information respectively without any need to sync the entire file every time. iExplorer helps to manage folders and transfer data for iOS devices, and it is a great iTunes alternative.
Pros
- The app displays the data of the Apple iPhone XS device in a clear layout
- The detection of the Apple iPhone XS device by the app is quick and thoroughly
- Allows users to drag and drop files for the transfer
Cons
- Many users complaint of crashing issues
- There are lots of pop-up dialog for full version purchase
- The access to SMS and the contacts information is with jailbreak terminals only
User Reviews
- Amazingly quick! Got the job in very short time. Very user-friendly.
- I forgot my login information for my old iTunes account and had no way of obtaining it since I was also using a new email address. I downloaded this program and it transferred all 600-something of my files within a minute or two. Saved me so much money!
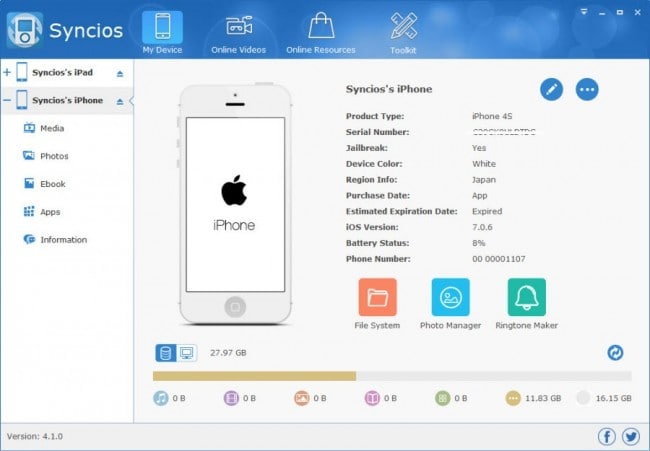
3. Syncios
Syncios also works as a decent iTunes alternative to transfer data between iOS devices and PC. The app allows users to transfer videos, photos, ringtones. TV shows, playlist, notes and all other data between iPhone/iPad/iPod and PC easily and quickly.
Pros
- Comes with easy setup wizard
- Excellent using experience when transfer files
Cons
- Free software does not comes with selected options to choose from
- Some users complain about the software collapse.
User Reviews
- Software crashed and we lost years of family photos, including photos of our kids with nanna who passed away recently. The scam part is this, if you go to the website you will notice they do data recovery, you can also download for free but to actually recover ‘photos’ etc, you have to pay $50.00 USD and there is the scam. They create the issue with the free software and then they sting you to give you back your photos. Warn everybody you know. BEWARE.
- Since I go through lots of music, videos, photos, I had to be able to backup the iPhones and this is where iTunes got kinda complicated for me. SyncIOS make the use of my Apple device much more user-friendly and comfortable.

How to Transfer Everything from Apple iPhone XS to iPhone
Well, you all know already from experience that transferring to an iPhone device from an Android phone is an uphill task, especially if you have no idea about the right way or the tool you should use. Transferring photos from one device to another one, should be done extra care as you wouldn’t want to lose your beloved memories, right?
Therefore, to transfer photos from Android to iPhone, such as iPhone 15, you will need third-party software, which is easy to access the application as well. Now, both Android and iPhone devices have different operating systems, which make it impossible to do direct transfers.
However, fortunately, there are plenty of high-quality third-party programs that can help you enable Android to iPhone photo transfer. So, start reading the guide below and choose the option that best suits you.
Part 1: How to transfer photos from Android to iPhone including iPhone 15/15 Pro(Max) with Dr.Fone?
If you are confused over which method you should choose for transferring photos from Android to iPhone, then compare the quality and the quickness of the chosen method. Well, to be frank, the tool that qualifies all these criteria is the Dr.Fone toolkit, which is a comprehensive solution that is well designed to tackle all mobile-related issues and tasks.
Dr.Fone is perfect because you can transfer across multiple devices regardless of OS. As an example, if you want to transfer photos from Android to iPad /iPhone and vice versa, it can be done easily by following two ways as mentioned below:
Method 1.1 One-click to Transfer Photos from Android to iPhone using Dr.Fone - Phone Transfer
Dr.Fone - Phone Transfer is a software package that facilitates cross-device transactions such as transferring photos from Android to iPhone. If you are in the process of replacing your Android with a new iPhone, then use Dr.Fone to transfer all contents to the new phone. The content can include photos, contacts, videos, and social media messages.
Dr.Fone - Phone Transfer
Transfer Data from Android to iPhone in 1 Click Directly!
- Cross-platform data shift between any device of your choice from Android and iPhone.
- Support massive data, including images, videos, music, messages, contacts, apps, and more.
- Works perfectly with almost mobile phones and tablets, such as iPhone, iPad, Samsung, Huawei, etc.
- Fully work with mobile system iOS 17 and Android 13 and computer system Windows 10 and Mac 14.
- 100% safe and risk-free, backup & restore data as the original.
3981454 people have downloaded it
Let us see the steps on how to transfer photos from Android to iPhone using Dr.Fone - Phone Transfer.
Step 1. Download and install Dr.Fone - Phone Transfer and launch it. Then select the Switch option from the main interface.

Step 2. Now, connect your Android and iPhone to the computer.
Step 3. As soon as you connect the Apple iPhone XS device, it will start recognizing it and mentioned it as the ‘Source’ phone or ‘Destination’ phone accordingly. In this case, make sure the Android phone is the Source, and the iPhone is the Destination. You can change their position using the Flip button.

Step 4. Finally, select the files you want to transfer (photos) and click on ‘Start Transfer’.

That was it. Soon, it will transfer pictures from Android to iPhone.
Method 1.2 Selectively Transfer photos from Android to iPhone using Dr.Fone - Phone Manager (Android)
Another way that can assist you in moving photos from Android to iPhone is the Dr.Fone - Phone Manager (Android) . What is incredibly convenient about Dr.Fone - Phone Manager (Android) is its ability to transfer photos selectively. You can also use it to transfer contacts, videos, messages, podcasts, and anything else stored on your Android in minutes. Dr.Fone - Phone Manager (Android) is a secure, trustworthy program. Hence you can be reassured that your information will be kept safe while transferring from one device to another.
Dr.Fone - Phone Manager (Android)
All in one Solution to Transfer Photos from Android to iPhone
- Transfer, backup, edit, export, import & view the data on your phone easily.
- Support multiple data on your phone: music, photos, videos, contacts, SMS, Apps, etc.
- Copy data from one phone to another phone without any data loss.
- Additional features to help you root your device, make gif image, and ringtone.
- Compatible with more than 3,000 Android phones ranging from Samsung to LG, HTC, Huawei, Motorola, Sony, etc.
3981454 people have downloaded it
Here either you can select the photos that you wish to transfer selectively or select all the photos at once. Now, as you wish to transfer photos to an iPhone device, connect your iPhone as the Target phone and then click on the box with the export symbol > Select Export to Device. The name of your iOS device should appear. Click on the Apple iPhone XS device to start transferring photos.
Part 2: Transfer photos from Android to iPhone including iPhone 15/15 Pro(Max) using Move to iOS App?
Now, to answer how to transfer photos from Android to iPhone, there is another simple solution that you can make use of. It is called the “Move to iOS app,” which you can download freely from the Google Play store.
Note: This solution only works when you set up the iPhone. If the iPhone is already set up, you need to factory reset it and set it up to restore photos with this App.
Now to proceed, first of all, you need to do some settings on your iPhone device as follows:
On your iPhone, go to a screen called ‘Apps & Data’ > choose ‘Move Data from Android’ option.


The next step is to take your Apple iPhone XS to complete the transfer process with the “Move to iOS” app.
- Switch to your Apple iPhone XS, open Google Play Store, and search for ‘Move to iOS’ app.
- Open the ‘Move to iOS’ app to accept permission requests, install it, and open the app.
- At this point, tap Continue on both your iOS and Android device.

- On your Apple iPhone XS, enter the 12-digit code of the iPhone. This is so that the ‘Move to iOS’ app knows which iOS device it has to transfer the data to.

Before the transfer starts, you will be asked a number of questions, like do you want to transfer Google Account information, Bookmarks, etc. Now, since you only want videos and photos, deselect the other options except ‘Camera Roll’
The above process to transfer pictures from Android to iPhone is good for mobile users who are unwilling to invest money in software. However, the method is not perfect because it is time-consuming. The transaction can neither be done quickly nor can it be done with a single click.
Part 3: How to transfer photos from Android to iPhone using Google Drive?
Google Drive is cloud storage that is available to those who have a Gmail address. It can store anything ranging from Word Documents to photos and videos. Hence, if you are wondering how to move photos from Android to iPhone, then Google Drive is your answer.
To go with the transfer of photos and videos from Android to iPhone with Google Drive, follow the steps outlined below:
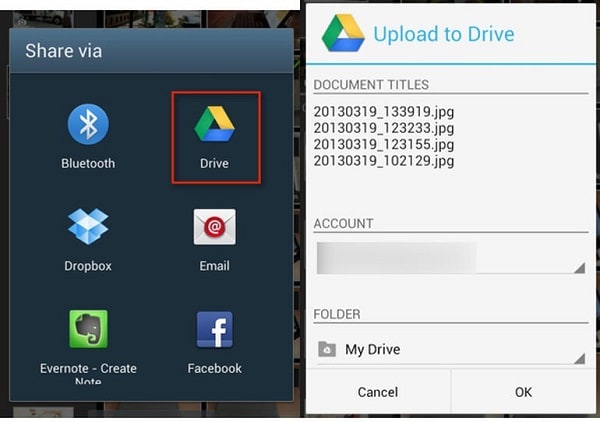
- First, make sure Google Drive is already installed on the Android device. If not, visit the Play Store to download Google drive. Then, on your Apple iPhone XS, visit the Gallery section> select the images> tap on Share button> and finally choose Share via Drive.
- Soon the file will get uploaded.
- Now, move to your iPhone.
- Here, download and install the Google Drive app onto your iPhone.
- Open the Drive (you must log in with the same Google ID). There you will see all the uploaded media files (Photos). Now, select ‘Save Image’ or ‘Save Video’ depending on your file type.
Part 4: Top 3 Android to iPhone photo transfer Apps
There are several apps that are specifically designed for storing and transferring images from an Android device to an iPhone. We have found the three best apps based on ease of use and accessibility.
PhotoSync
PhotoSync is a free photo-sharing app available on both Android and iOS devices. The app lets you store all your photos on one device and then transfer it to another device through Wi-Fi. PhotoSync is designed to work with several devices besides Android and iOS devices. It works on different platforms, including desktop computers, NAS, and Cloud Services.
You can extract videos and photos directly from the camera and transfer them to another device. You can even access the photos/videos via a web browser. PhotoSync is regularly updated with features to make the experience better support for RAW files and preserves for EXIF-data.
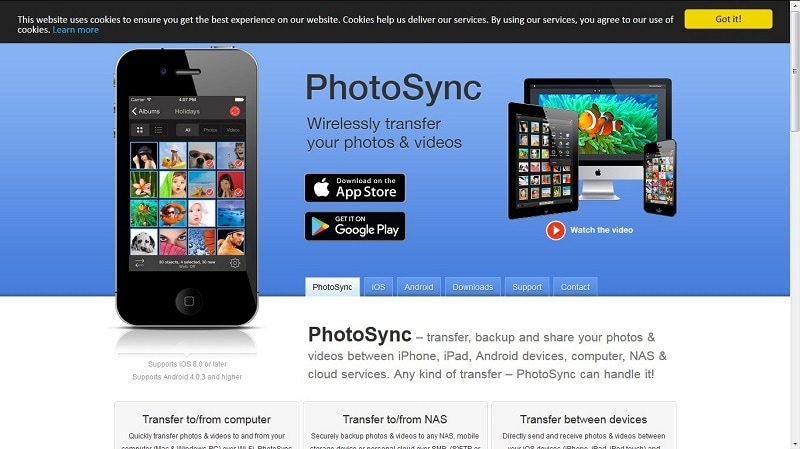
Photo Transfer
The photo transfer app is an incredibly popular app and with a good reason. You can perform Android to iPhone photo transfer without any cables. You can access Photo Transfer on different platforms, including desktop computers. It allows you to access your photos stored on the app via a web browser. You can easily download multiple photos for storage and exchange these photos across multiple platforms. If you are in need of an intuitive, easy to use app transfer photos to iPhone from Android, then consider using the Photo Transfer app.

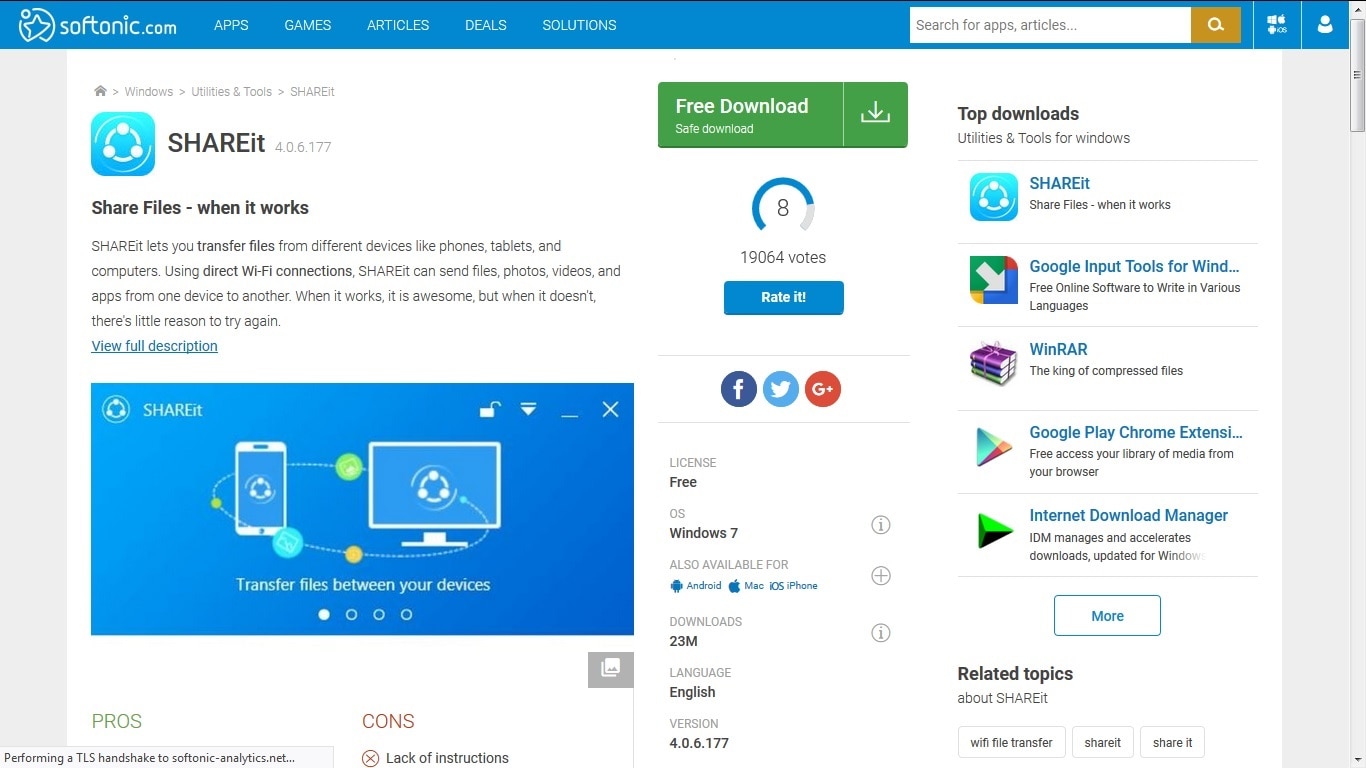
Shareit
Shareit is a special application developed to transfer files between two devices. You can use Shareit to transfer pictures from Android to iPhone in seconds. The software is free and completely secure, so you do not have to worry about how to transfer photos from one device to another. You can share individual photos or entire folders on Shareit. However, it should be noted that sharing folders can make slow down the process.
The best part of Shareit is the freedom allowed to users because you can transfer different file types besides photos. Hence, if you are wondering how to transfer video from Android to iPhone, then Shareit is your answer. The software is constantly being updated to make sure it is safe. Therefore, if users need to transfer more than just photos like sensitive information, they can rest assured about Shareit’s reliability.
Thus, after going through the article, we are sure that you got a wide range of options to choose from to transfer your Apple iPhone XS photos to the iPhone. Well, every method is good in itself; however, we would like to say that one of the best options for you would be the Dr.Fone tool without a doubt.
5 Tutorials on How to Transfer Photos From Apple iPhone XS to New iPhone
When it comes to camera systems, the iPhone is certainly ahead of others. It has high-performing lenses and professional camera features that support various photography styles. For instance, you may use the Priotize Faster Shooting option to capture multiple photos at a time. Another thing is that you may enable Action Mode when shooting videos to keep the frame stable throughout the duration. Simply put, you can surely do a lot of things using your iPhone camera
Let’s say you’re planning to share your stunning snaps and footage with others. Is it possible to facilitate the transfer with little to no effort? The short answer is absolutely yes. There are many easy ways to move your media files between two iPhones. In no time, you can surely find the best tutorial on how to transfer photos from Apple iPhone XS to iPhone. Just choose one that matches perfectly your current situation.
In this article, we will talk about the iPhone’s Shared Album feature and its main benefits to users. We will also provide some tutorials on how to transfer pictures from Apple iPhone XS to iPhone quickly and easily. Continue reading below to learn more.
Everything You Need to Know About Shared Album
The Photos mobile application on iOS devices is a very powerful gallery software. It provides numerous options to help you organize and manage all your media files in one place. When it comes to data transfer, Photos offers users some channels to facilitate such procedures. One of which is through the syncing feature called Shared Album. It’s basically an ordinary folder where you can move and store your media files. But as the name suggests, you can share this folder with others by simply granting them access to it. Don’t worry. Your Shared Albums remain private on the platform. Only the people you add as subscribers can view its content and make changes. Therefore, the Shared Album feature is the best answer to the question: “How to transfer photos from Apple iPhone XS to iPhone.”
It’s true to say that Shared Album is a great iOS feature. However, it’s important to point out that it also has a few limitations. First on the list is the type of files supported by this feature. For images, Shared Album is compatible with photos in HEIF, JPEG, RAW, PNG, GIF, and TIFF formats. On the one hand, video formats supported by Shared Album include HEVC, MP4, QuickTime, H.264, and MPEG-4. Another thing to consider is the capacity of the Shared Album folder. By default, you can only store up to 5000 photos or videos in the album.
Do you find Shared Album a useful tool, though? If so, here are the tutorials on how to activate this feature and create one in the Photos app.
How to Activate Shared Album?
Here’s how to activate Shared Album on Settings.
- Step 1: Go to Settings.
- Step 2: Click your Apple ID Profile.

- Step 3: Click iCloud.
- Step 4: Click Photos.

- Step 5: Toggle on the radio button next to Shared Albums.

How to Create Shared Albums in Photos
Here’s how to create Shared Albums in Photos.
- Step 1: Go to the Photos.
- Step 2: Click the Album tab.
- Step 3: Click the + icon at the top-left corner of your screen to add a new folder.

- Step 4: Click New Shared Album.

- Step 5: Rename the Shared Album and then click Create.
How to Transfer Photos From Apple iPhone XS to iPhone in Easy Steps?
Undoubtedly, the Shared Album feature is a very convenient way to move media files from one iPhone to another. Imagine all you have to do is consolidate all the files in a Shared Album folder and add subscribers. From there, you can easily access the album on multiple iOS devices and download the files. But it’s important to note that there are other photo transfer methods you can try apart from using Shared Album. Check out the 5 tutorials below on how to transfer photos from Apple iPhone XS to iPhone.
Method 1: Transfer photos from Apple iPhone XS to iPhone by enabling iCloud photos
How do I transfer photos from Apple iPhone XS to iPhone? Well, the easiest way is to sync the photos to iCloud and enable the iCloud photos on both devices. Don’t worry. It’s very easy to set up. Here’s how to transfer photos from Apple iPhone XS to iPhone using iCloud.
- Step 1: On your device that contains the files, go to Settings.
- Step 2: Click on the Apple ID Profile.
- Step 3: Click Photos.

- Step 4: Toggle on the radio button next to Sync This iPhone. From then on, your iPhone will sync your photos to iCloud.

- Step 5: Do the same series of steps on the other iPhone. Once the synchronization has been completed, open the Photos app. Find the newly synced iCloud photos on the All Photos album.
Method 2: Transfer photos from Apple iPhone XS to iPhone using AirDrop
If you’re just sending a few pieces of photos, AirDrop is indeed a great transfer medium. It’s basically a wireless sharing option allowing users to send files between two iOS devices. Do you want to try it? Here’s how to transfer photos from Apple iPhone XS to iPhone using AirDrop.
- Step 1: Toggle on the Wi-Fi and Bluetooth connectivity on both iPhones. After that, find the AirDrop option on the two devices and then switch it on. Choose Everyone.

- Step 2: On the Apple iPhone XS device that contains the files, go to Photos. Select the images you want to transfer. After that, click the Share button at the bottom-left corner of your screen.
- Step 3: Choose AirDrop.

- Step 4: Select the recipient from the provided list. After that, accept the AirDrop request on the other device.
Method 3: Transfer photos from Apple iPhone XS to iPhone via Mail
Another reliable method you can try is to email the photos from one iPhone to another. Like AirDrop, it works great if you’re just moving a few bits of files to another device. Don’t work. The process will not take much time. Here’s how to transfer photos from Apple iPhone XS to iPhone via Mail.
- Step 1: On the Apple iPhone XS device containing the files, go to the Photos app.
- Step 2: Select the specific photos you want to transfer. After that, click the Share icon at the bottom-left corner of your screen.
- Step 3: Choose Mail among the given options.

- Step 4: Key in the email address of the recipient. Subsequently, click the Send icon.
- Step 5: Open the email on the other iPhone. Then, download the photos sent as email attachments.
Method 4: Transfer photos from Apple iPhone XS to iPhone using iCloud Link
Let’s say you’re sending one photo to another iPhone user. What is the best transfer option in this case? If you’re currently using iCloud photos might as well send files through the iCloud link. Don’t worry. It’s not that hard to get such details. Here’s how to transfer photos from Apple iPhone XS to iPhone using the iCloud link.
- Step 1: On the Apple iPhone XS device where your files are stored, go to the Photos app.
- Step 2: Select the specific group of images you want to transfer. Right after, click the Share icon at the bottom-left corner of your screen.
- Step 3: Scroll down and find the Copy iCloud Link. Click on it.

- Step 4: Share the iCloud link via Messages, Mail, or internet messaging platform. On the other iPhone device, access the link and then download the photos from there.
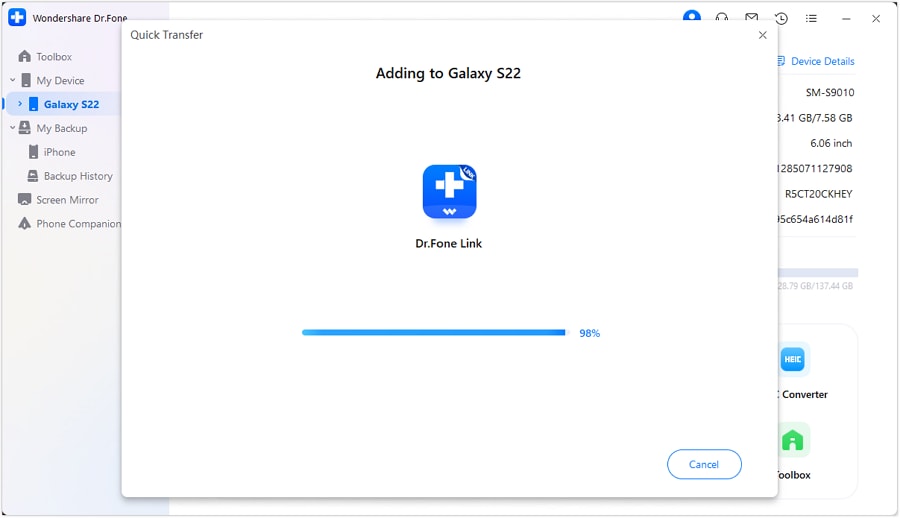
Method 5: Transfer photos from Apple iPhone XS to iPhone using Wondershare Dr.Fone
The first four tutorials above on how to transfer pictures from Apple iPhone XS to iPhone are very easy to follow. But if you wish to explore another convenient option, Wondershare Dr.Fone can help you with that. Its phone transfer feature has a powerful facility that can move your photos and other files between two mobile devices. Here’s how to use it in easy steps.
- Step 1: Download Wondershare Dr.Fone from its official website. Then, install it on your computer.
- Step 2: Open the newly installed software on your desktop. After it fully loads, connect your two iPhones using a data cable.
- Step 3: Access the left-side panel and then click Toolbox. On the main dashboard, click Phone Transfer.
- Step 4: Set the iPhone that contains the photos as the Source and the other iPhone as the Target. Alternatively, click the Flip button to modify the transfer path according to your liking.

- Step 5: Click Photos as the category of the files. Right after, click Start Transfer to proceed.

- Step 6: Wait while Wondershare Dr.Fone is facilitating the transfer. If you wish to terminate the progress, simply click Cancel.

- Step 7: After completing the process, click OK to wrap it up. Check your files from their respective locations afterward.

BONUS TIP: Back Up Your Photos First
The tutorials above on how to transfer all photos from Apple iPhone XS to iPhone are safe to initiate. You can be sure about that. But as an additional layer of protection, it’s best to back up your iPhone first before the transfer. Don’t worry. Wondershare Dr.Fone. simplifies the backup process for you. Here’s a quick tutorial to get you started.
- Step 1: Launch the Wondershare Dr.Fone on your computer. After it fully loads up, connect your iPhone using a data cable.
- Step 2: Access the left-side panel and then click My Backup. On the main dashboard, click Back Up Now.

- Step 3: Follow the on-screen instructions for SMS backup. After that, click OK to proceed.

- Step 4: Wait while Wondershare Dr.Fone is backing up your files.

- Step 5: After completing the backup process, click View Backups or Open in Folder to check your files.

Conclusion
Transferring photos between two iOS devices is very easy. In fact, you can instantly complete the migration process with just the snap of a finger. Refer to the five tutorials above on how to transfer photos from Apple iPhone XS to iPhone enumerated. One of them can certainly fit your situation and help you in this regard. For a more convenient file transfer option, download Wondershare Dr.Fone for free. It has a potent phone transfer feature that can aid in the transfer of your dearly cherished photos.
Also read:
- [New] 2024 Approved Unleash Your Photo Potential with Instagram Filters
- [New] In 2024, Time Markers for YouTube Videos Expert Tips (Desktop/Mobile)
- [Updated] Your Browsing Bliss Discover the Most Effective 7 Android AdBlockers for 2024
- 2024 Approved Becoming a Confident Content Creator YouTube's Top Tips
- Decode and Repair: Why Is My Fortnite Audio Not Playing?
- How to Remove a Previously Synced Google Account from Your Vivo Y36i
- In 2024, 6 Methods for Switching from Apple iPhone 12 to Samsung | Dr.fone
- In 2024, Easy Methods How To Transfer Pictures From Apple iPhone 12 Pro to PC | Dr.fone
- In 2024, How to Use Google Assistant on Your Lock Screen Of Motorola Defy 2 Phone
- In 2024, Methods to Transfer from Apple iPhone 11 Pro to Android | Dr.fone
- iPhone Transfer Transfer Contact from Apple iPhone SE (2020) to iPhone without iCloud | Dr.fone
- Seamless Steps for Simplified Partition and Volume Duplication
- Ultimate Guide, How to Transfer Music From Apple iPhone 14 Pro to iPhone | Dr.fone
- What Is the Windows 11 Update Error 0X800f0922? Here's How to Fix It
- Title: How to Transfer/Sync Notes from Apple iPhone XS to iPad | Dr.fone
- Author: Charlotte
- Created at : 2024-10-22 21:43:06
- Updated at : 2024-10-24 04:33:01
- Link: https://iphone-transfer.techidaily.com/how-to-transfersync-notes-from-apple-iphone-xs-to-ipad-drfone-by-drfone-transfer-from-ios/
- License: This work is licensed under CC BY-NC-SA 4.0.