Complete Tutorial Sending Photos From Apple iPhone 13 mini to iPad | Dr.fone
Complete Tutorial: Sending Photos From Apple iPhone 13 mini to iPad
Among the array of iOS devices, the iPhone and iPad stand as popular companions for capturing and storing precious moments. However, navigating the process of transferring photos from Apple iPhone 13 mini to iPad can sometimes feel daunting. Fortunately, with the evolution of Apple’s ecosystem, it has become a straightforward task.
Now, the process can be managed with various methods and tools available at your disposal. The guide aims to effortlessly transfer your photos from an iPhone to an iPad. From utilizing iCloud and AirDrop to exploring third-party applications, we’ll cover step-by-step instructions.

Part 1: How To Transfer Photos From Apple iPhone 13 mini to iPad Using AirDrop
AirDrop stands as one of the most convenient and straightforward methods. It can transfer photos between Apple devices wirelessly. This functionality employs Bluetooth and Wi-Fi to establish a direct link between your iPhone and iPad. That enables smooth photo sharing without requiring additional cables or an internet connection. Here’s a detailed guide outlining the process of how to transfer photos from Apple iPhone 13 mini to iPad using AirDrop:
- Step 1. On your iPhone and iPad, swipe down from the top right corner to open the Control Center. Tap and hold the connectivity panel; within, press and hold the network connectivity box that includes AirDrop. Choose “Contacts Only” or “Everyone” to enable AirDrop visibility.

- Step 2. To begin, access the Photos app on your iPhone and pick the photos you’d like to transfer to your iPad. Afterward, select the “Share” icon within the app, and from the available options, opt for “AirDrop.” Look for your iPad in the AirDrop panel displayed and tap on it to start the transfer process.

- Step 3. When your iPad receives the notification prompting you to accept the incoming photos from the iPhone, tap “Accept.” The selected images will be saved to your iPad’s Photos app.

Part 2: How To Transfer Photos From Apple iPhone 13 mini to iPad Using iCloud Sync
iCloud offers a smooth way to synchronize photos across your Apple devices. It ensures your photo library remains up-to-date without manual intervention. Enabling iCloud Photos automatically uploads your images to iCloud, allowing access from any device linked to the same Apple ID. Here’s a guide to transfer photos from Apple iPhone 13 mini to iPad automatically via iCloud:
- Step 1. Begin by accessing your iPhone’s Settings and tapping your name at the top. On the following screen, choose “iCloud” followed by “Photos” on the next window. Here, ensure that “Sync this iPhone” is toggled for iCloud Photos.

- Step 2. Now, move to iPad and ensure you are logged in with the same Apple ID. Then, go to “Settings,” tap the name, press “iCloud,” and tap “Photos.” Here, you need to toggle on the “Sync this iPad” option. Afterward, wait for some time to let the syncing process complete. The speed of synchronization depends on your internet connection and the number of photos being uploaded.

Part 3: One-Click Innovative Solution To Transfer Photos From Apple iPhone 13 mini to iPad
Wondershare Dr.Fone presents an innovative and user-friendly solution. It offers a comprehensive way to transfer photos between your iPhone and iPad. This software provides a straightforward method to transfer photos selectively or entirely. Moreover, when using it, you are no longer bound by the constraints of iCloud or AirDrop. The following are the detailed guides for transferring photos using Wondershare Dr.Fone:
3.1 Transfer Selective Photos from Apple iPhone 13 mini to iPad
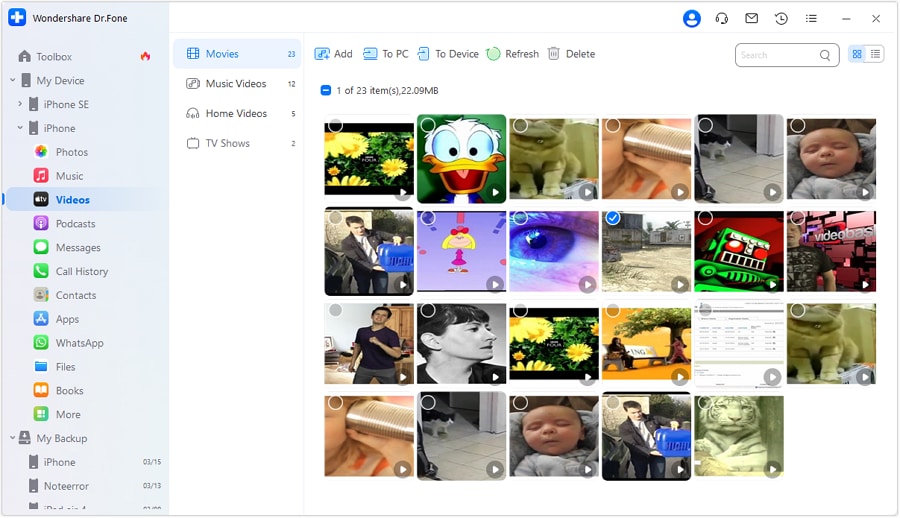
Wondershare Dr.Fone is an intelligent iPhone transfer and management solution. It is designed to streamline your data handling. With its array of functions, you can manage your data through importing, exporting, and deletion processes. This tool offers the convenience of quick file transfers by simply dragging and dropping files. Here is how to add photos from Apple iPhone 13 mini to iPad using Wondershare Dr.Fone:
- Step 1: Install and Open the Latest Wondershare Dr.Fone App
You can begin by installing the latest version of Wondershare Dr.Fone from its official website. Once installed, launch it and connect your iPhone and iPad to the computer. When the Apple iPhone 13 mini devices are detected by Dr.Fone, click on the “iPhone” name to expand it in the left panel.

- Step 2: Transfer the Photos to the iPad from the iPhone
From the expanded options, choose “Photos” to access your iPhone’s photos. Here, select the files you want to transfer and click “To Device.” Now, choose the “iPad” from the available options, and the photos will be transferred in no time. You can send as many as you like without any constraints.
3.2 Transfer All Photos From Apple iPhone 13 mini to iPad
When moving photos in bulk from Apple iPhone 13 mini to iPad, Wondershare Dr.Fone also got you covered. It offers a powerful phone transfer feature that can transfer over 18 types of data from one device to another. Dr.Fone simplifies the process of transferring data between phones with just one click. It facilitates the smooth transfer of various data types, like photos. You can follow these simplified steps to transfer photos from Apple iPhone 13 mini to iPad:
- Step 1: Navigate to Phone Transfer within Wondershare Dr.Fone
Once you have launched Wondershare Dr.Fone, connect the iPhone and iPad to the computer. Then, click “Toolbox” from the left side panel and tap the “Phone Transfer” option from the available choices. Then, you will be asked to position your devices correctly for data transfer.

- Step 2: Successfully Complete the Photos Transfer Process
When assigning positions, the iPhone will be the “Source” device. On the other hand, the iPad will become the “Destination” device. You can use the “Flip” to change the Apple iPhone 13 mini devices’ positions. Afterward, select “Photos” from the data and click “Start Transfer” to initiate the process.

Part 4: How To Transfer Photos From Apple iPhone 13 mini to iPad Using iTunes/Finder
iTunes or Finder can also be used to transfer photos from your iPhone to your iPad. It is the official Apple software for music, media, and backup management. Yet, iTunes/Finder can assist in manually syncing photos between your iOS devices. The steps needed to transfer photos from Apple iPhone 13 mini to iPad automatically are given below:
- Step 1. Connect your iPhone to the PC or Mac and open the Photos app. In the Photos app, tap “Import,” select your iPhone, and wait for the computer to load photos from the iPhone. Once they are loaded, choose to transfer the targeted to the computer.

- Step 2. When photos are moved to your computer, unplug the iPhone and link your iPad. Now run the latest version of iTunes/Finder on your PC/Mac and tap the Apple iPhone 13 mini device icon. Here, choose “Photos” from the left panel and check the box next to “Sync Photos.”

- Step 3. Now, choose the folder where you moved photos from the iPhone in the drop-down box. After that, hit the “Apply” button and wait for the images to sync with the iPad.

Part 5: How To Transfer Photos From Apple iPhone 13 mini to iPad Using Social Media Apps
Social media apps can serve as a convenient platform for transferring photos. Numerous options are available for transferring pictures, and one of the widely used applications is WhatsApp. It is known for its communication features. Moreover, it enables users to share images and media files across various devices. Here’s a guide on how to transfer photos from Apple iPhone 13 mini to iPad via WhatsApp:
- Step 1. After ensuring WhatsApp is running on both devices, open WhatsApp on iPhone. Tap the new chat icon to start a conversation with a WhatsApp account logged in on the iPad. Now, tap the “+” icon and choose either “Document,” “Camera,” or “Gallery” and pick the desired images. After selecting the photos, tap “Send” to transfer them to iPad.

- Step 2. Proceed to the iPad and launch the “WhatsApp Web” on Safari. Following this, access your conversations and download the images you received to complete the transfer process.

Part 6: How To Transfer Photos From Apple iPhone 13 mini to iPad Using Email
Utilizing email provides a direct and frequently used approach for transferring photos between your iPhone and iPad. However, it might not be suitable for larger quantities of high-resolution images due to attachment size limits. Nevertheless, it is effective for smaller batches of images. Here’s a detailed guide on how to utilize email for transferring photos between your iPhone and iPad:
- Step 1. Access the email app on your iPhone and initiate a new email. Input your iPad email address in the recipient field. Next, tap on the “Attachment” icon to select the images you want to send.

- Step 2. Move to your iPad and on the “Mail” app there. Now navigate to “Inbox” and open the newly received email. Tap the attachments and save them to your device to complete the transfer process.

Conclusion
Transferring photos between your iPhone and iPad is an essential task for many users. Throughout this guide, we’ve explored various methods to transfer photos from Apple iPhone 13 mini to iPad. These ranged from native Apple services like AirDrop, iCloud, and iTunes/Finder to unconventional approaches such as social media apps and email. Each method offers its advantages.
Yet, considering factors like convenience, ease of use, and efficiency, one option stands out as a versatile and user-friendly solution: Wondershare Dr.Fone. This innovative third-party software provides a hassle-free way to transfer photos between iOS devices. It offers both selective and bulk transfer options with a straightforward interface.
4 Ways to Transfer Contacts from Apple iPhone 13 mini to iPhone Quickly
Thought changing into a new phone is exciting, but changing phones can be a real pain because you have to move all your data into your new phone like iPhone 15 or iPhone 15 Pro (Max). Contacts are very important data on your phone because you won’t be able to make any calls or send texts to your known persons or friends and family without them. If you are an iPhone user, you need to follow some processes to transfer contacts from Apple iPhone 13 mini to iPhone. Also, you may want to import contacts from excel to iPhone . This article will give you all the information you need about how you can transfer contacts from Apple iPhone 13 mini to new iPhone like iPhone 15 or iPhone 15 Pro (Max).
Part 1. Transfer Contacts from Apple iPhone 13 mini to iPhone Including iPhone 15 with Dr.Fone (1- click solution)
Dr.Fone is a perfect tool for transferring contacts from Apple iPhone 13 mini to iPhone. It can transfer contacts and all kinds of data and media files from your iPhone to iPhone or Android and vice-versa. Dr.Fone - Phone Transfer is a great tool that supports all the latest iOS and Android-based smartphones; it also works smoothly on Windows and Mac. It’s the easiest, fastest, and safest way to transfer contacts from Apple iPhone 13 mini to iPhone.
Dr.Fone - Phone Transfer
1-Click Phone to Phone Transfer
- Easy, fast, and safe.
- Move data between devices with different operating systems, i.e., iOS to Android.
- Supports iOS devices that run the latest iOS

- Transfer photos, text messages, contacts, notes, and many other file types.
- Supports over 8000+ Android devices. Works for all models of iPhone, iPad, and iPod.

Follow these steps to learn how to transfer contacts from one iPhone to another.
Start The Process
First, you need to download dr. Fone on your computer and install it. Run the program and connect both of your iPhones to your computer with good-quality data cables. You will be able to see the home screen of Dr.Fone in front of you, and you will have to choose the option named “Phone Transfer.”
Transfer Contacts
Dr.Fone will show you both iPhones on your screen, and you will have to choose the “Contacts” option and click on the “Start Transfer” button.

Finish The Process
Your contacts will be transferred from the source iPhone to the target iPhone within a very short time.

Transferring contacts is easy with Dr.Fone - Phone Transfer. This doesn’t overwrite any data on your phone or doesn’t cause any data loss problem. Just follow the process to learn how to copy contacts from iPhone with the help of Dr.Fone - Phone Transfer.
Part 2. Transfer Contacts from Apple iPhone 13 mini to iPhone Including iPhone 15 by restoring from iCloud backup
You can easily transfer your contacts using iCloud backup without factory resetting the entire device and starting again. Just follow this process-
Log in to iCloud
You need to connect both your iPhones to Wi-Fi and log into your iCloud account from both of your iPhones.
Sync Contacts and Backup
Now you need to take your source iPhone and go to the Settings option. Then you need to tap the name at the top, go to the iCloud option, scroll down and make sure the option for Contact is toggled on. If you have iOS 10.2 and earlier on your phone, you will find it in Settings > iCloud.

After syncing the contacts, you need to scroll down to the iCloud Backup option and choose the Backup Now option.

Refresh Contacts
Ensure that the syncing contact option on your target iPhone is enabled from the settings option, and then open the contact app to swipe down and refresh it. Within a very short time, your contacts will start appearing on your target iPhone.
Part 3. Sync contacts from Apple iPhone 13 mini to iPhone Including iPhone 15 by iCloud syncing
You can easily learn how to transfer contacts from one iPhone to another (like iPhone 15 or iPhone 15 Pro) using iCloud syncing. It takes very little time, and all it needs is one apple account signed in to both your source and target iPhones at a time. Just follow these steps properly-
Merge Contacts
You need to go to the “Settings” option of your source iPhone and tap on your name at the top of the settings screen. Check the “Contacts” option is toggled on or not from the “iCloud” option. After that, hit merge to upload your contacts on iCloud.

You need to use the Apple ID and password on your target phone and do the same thing to toggle on the “Contacts” option from “iCloud” and wait until your iPhone asks you to merge contacts.

Refresh Contacts
After choosing the “Merge” option, you will see that existing contacts and previous contacts from the source iPhone will merge on your target iPhone. Now you need to refresh the contact list, which will allow you to find all the old contacts to your target iPhone.

Part 4. Move Contacts from Apple iPhone 13 mini to iPhone Including iPhone 15 using iTunes
iTunes is a great solution to transfer iPhone contacts. Many users prefer iTunes while transferring contacts because it comes directly from Apple, and it takes care of all your iOS device management needs. These steps will help you to transfer contacts from Apple iPhone 13 mini to iPhone using iTunes-
Install iTunes and connect source iPhone
Download the latest version of iTunes on your PC, install it properly, and launch the software. Connect your source iPhone to your PC, and iTunes will automatically detect it.
Backup Contacts
Now click on the “Device” option and then select iPhone. Then you need to select the “Summary” option and then choose “This Computer” and “Back Up Now” to back up all your data and contacts on your PC.

Restore Backup
In the end, you need to connect your target iPhone to your PC and choose the “Summary” option in the iTunes software. You need to choose the “Restore Backup” option and then browse and select the latest backup folder. At last, choose the “Restore” option. iTunes transfers contacts and all the data from the source iPhone to target the iPhone, and it’s essential to back up the data from your source iPhone.

Transferring any data from your old phone to a new phone can be very painful. But nowadays it’s very easy with the help of a lot of tools. If you want to transfer contacts from your old iPhone to a new one, you need to use Dr.Fone - Phone Transfer because it’s the best solution to use a 1-Click system to copy contacts from one phone to another in a very easy and fast way. You can also use iCloud backup, iCloud syncing, and iTunes to transfer your contacts, but Dr.Fone can give you the safest and easiest solution. I can assure you that you won’t regret it if you choose Dr.Fone for this issue.
5 Tutorials on How to Transfer Photos From Apple iPhone 13 mini to New iPhone
When it comes to camera systems, the iPhone is certainly ahead of others. It has high-performing lenses and professional camera features that support various photography styles. For instance, you may use the Priotize Faster Shooting option to capture multiple photos at a time. Another thing is that you may enable Action Mode when shooting videos to keep the frame stable throughout the duration. Simply put, you can surely do a lot of things using your iPhone camera
Let’s say you’re planning to share your stunning snaps and footage with others. Is it possible to facilitate the transfer with little to no effort? The short answer is absolutely yes. There are many easy ways to move your media files between two iPhones. In no time, you can surely find the best tutorial on how to transfer photos from Apple iPhone 13 mini to iPhone. Just choose one that matches perfectly your current situation.
In this article, we will talk about the iPhone’s Shared Album feature and its main benefits to users. We will also provide some tutorials on how to transfer pictures from Apple iPhone 13 mini to iPhone quickly and easily. Continue reading below to learn more.
Everything You Need to Know About Shared Album
The Photos mobile application on iOS devices is a very powerful gallery software. It provides numerous options to help you organize and manage all your media files in one place. When it comes to data transfer, Photos offers users some channels to facilitate such procedures. One of which is through the syncing feature called Shared Album. It’s basically an ordinary folder where you can move and store your media files. But as the name suggests, you can share this folder with others by simply granting them access to it. Don’t worry. Your Shared Albums remain private on the platform. Only the people you add as subscribers can view its content and make changes. Therefore, the Shared Album feature is the best answer to the question: “How to transfer photos from Apple iPhone 13 mini to iPhone.”
It’s true to say that Shared Album is a great iOS feature. However, it’s important to point out that it also has a few limitations. First on the list is the type of files supported by this feature. For images, Shared Album is compatible with photos in HEIF, JPEG, RAW, PNG, GIF, and TIFF formats. On the one hand, video formats supported by Shared Album include HEVC, MP4, QuickTime, H.264, and MPEG-4. Another thing to consider is the capacity of the Shared Album folder. By default, you can only store up to 5000 photos or videos in the album.
Do you find Shared Album a useful tool, though? If so, here are the tutorials on how to activate this feature and create one in the Photos app.
How to Activate Shared Album?
Here’s how to activate Shared Album on Settings.
- Step 1: Go to Settings.
- Step 2: Click your Apple ID Profile.

- Step 3: Click iCloud.
- Step 4: Click Photos.

- Step 5: Toggle on the radio button next to Shared Albums.

How to Create Shared Albums in Photos
Here’s how to create Shared Albums in Photos.
- Step 1: Go to the Photos.
- Step 2: Click the Album tab.
- Step 3: Click the + icon at the top-left corner of your screen to add a new folder.

- Step 4: Click New Shared Album.

- Step 5: Rename the Shared Album and then click Create.
How to Transfer Photos From Apple iPhone 13 mini to iPhone in Easy Steps?
Undoubtedly, the Shared Album feature is a very convenient way to move media files from one iPhone to another. Imagine all you have to do is consolidate all the files in a Shared Album folder and add subscribers. From there, you can easily access the album on multiple iOS devices and download the files. But it’s important to note that there are other photo transfer methods you can try apart from using Shared Album. Check out the 5 tutorials below on how to transfer photos from Apple iPhone 13 mini to iPhone.
Method 1: Transfer photos from Apple iPhone 13 mini to iPhone by enabling iCloud photos
How do I transfer photos from Apple iPhone 13 mini to iPhone? Well, the easiest way is to sync the photos to iCloud and enable the iCloud photos on both devices. Don’t worry. It’s very easy to set up. Here’s how to transfer photos from Apple iPhone 13 mini to iPhone using iCloud.
- Step 1: On your device that contains the files, go to Settings.
- Step 2: Click on the Apple ID Profile.
- Step 3: Click Photos.

- Step 4: Toggle on the radio button next to Sync This iPhone. From then on, your iPhone will sync your photos to iCloud.

- Step 5: Do the same series of steps on the other iPhone. Once the synchronization has been completed, open the Photos app. Find the newly synced iCloud photos on the All Photos album.
Method 2: Transfer photos from Apple iPhone 13 mini to iPhone using AirDrop
If you’re just sending a few pieces of photos, AirDrop is indeed a great transfer medium. It’s basically a wireless sharing option allowing users to send files between two iOS devices. Do you want to try it? Here’s how to transfer photos from Apple iPhone 13 mini to iPhone using AirDrop.
- Step 1: Toggle on the Wi-Fi and Bluetooth connectivity on both iPhones. After that, find the AirDrop option on the two devices and then switch it on. Choose Everyone.

- Step 2: On the Apple iPhone 13 mini device that contains the files, go to Photos. Select the images you want to transfer. After that, click the Share button at the bottom-left corner of your screen.
- Step 3: Choose AirDrop.

- Step 4: Select the recipient from the provided list. After that, accept the AirDrop request on the other device.
Method 3: Transfer photos from Apple iPhone 13 mini to iPhone via Mail
Another reliable method you can try is to email the photos from one iPhone to another. Like AirDrop, it works great if you’re just moving a few bits of files to another device. Don’t work. The process will not take much time. Here’s how to transfer photos from Apple iPhone 13 mini to iPhone via Mail.
- Step 1: On the Apple iPhone 13 mini device containing the files, go to the Photos app.
- Step 2: Select the specific photos you want to transfer. After that, click the Share icon at the bottom-left corner of your screen.
- Step 3: Choose Mail among the given options.

- Step 4: Key in the email address of the recipient. Subsequently, click the Send icon.
- Step 5: Open the email on the other iPhone. Then, download the photos sent as email attachments.
Method 4: Transfer photos from Apple iPhone 13 mini to iPhone using iCloud Link
Let’s say you’re sending one photo to another iPhone user. What is the best transfer option in this case? If you’re currently using iCloud photos might as well send files through the iCloud link. Don’t worry. It’s not that hard to get such details. Here’s how to transfer photos from Apple iPhone 13 mini to iPhone using the iCloud link.
- Step 1: On the Apple iPhone 13 mini device where your files are stored, go to the Photos app.
- Step 2: Select the specific group of images you want to transfer. Right after, click the Share icon at the bottom-left corner of your screen.
- Step 3: Scroll down and find the Copy iCloud Link. Click on it.

- Step 4: Share the iCloud link via Messages, Mail, or internet messaging platform. On the other iPhone device, access the link and then download the photos from there.
Method 5: Transfer photos from Apple iPhone 13 mini to iPhone using Wondershare Dr.Fone
The first four tutorials above on how to transfer pictures from Apple iPhone 13 mini to iPhone are very easy to follow. But if you wish to explore another convenient option, Wondershare Dr.Fone can help you with that. Its phone transfer feature has a powerful facility that can move your photos and other files between two mobile devices. Here’s how to use it in easy steps.
- Step 1: Download Wondershare Dr.Fone from its official website. Then, install it on your computer.
- Step 2: Open the newly installed software on your desktop. After it fully loads, connect your two iPhones using a data cable.
- Step 3: Access the left-side panel and then click Toolbox. On the main dashboard, click Phone Transfer.
- Step 4: Set the iPhone that contains the photos as the Source and the other iPhone as the Target. Alternatively, click the Flip button to modify the transfer path according to your liking.

- Step 5: Click Photos as the category of the files. Right after, click Start Transfer to proceed.

- Step 6: Wait while Wondershare Dr.Fone is facilitating the transfer. If you wish to terminate the progress, simply click Cancel.

- Step 7: After completing the process, click OK to wrap it up. Check your files from their respective locations afterward.

BONUS TIP: Back Up Your Photos First
The tutorials above on how to transfer all photos from Apple iPhone 13 mini to iPhone are safe to initiate. You can be sure about that. But as an additional layer of protection, it’s best to back up your iPhone first before the transfer. Don’t worry. Wondershare Dr.Fone. simplifies the backup process for you. Here’s a quick tutorial to get you started.
- Step 1: Launch the Wondershare Dr.Fone on your computer. After it fully loads up, connect your iPhone using a data cable.
- Step 2: Access the left-side panel and then click My Backup. On the main dashboard, click Back Up Now.

- Step 3: Follow the on-screen instructions for SMS backup. After that, click OK to proceed.

- Step 4: Wait while Wondershare Dr.Fone is backing up your files.

- Step 5: After completing the backup process, click View Backups or Open in Folder to check your files.

Conclusion
Transferring photos between two iOS devices is very easy. In fact, you can instantly complete the migration process with just the snap of a finger. Refer to the five tutorials above on how to transfer photos from Apple iPhone 13 mini to iPhone enumerated. One of them can certainly fit your situation and help you in this regard. For a more convenient file transfer option, download Wondershare Dr.Fone for free. It has a potent phone transfer feature that can aid in the transfer of your dearly cherished photos.
Also read:
- [New] In 2024, Unlock Your Screen Android's Premier Free Recorder Tools
- [New] No Monetary Investment? How to Acquire FCP
- [New] Structuring Videos for Maximum Impact on YouTube
- 2024 Approved Composing Prime Canon Temporal Vignettes
- 4 Ways to Transfer Music from Apple iPhone 13 Pro Max to iPod touch | Dr.fone
- Crash No More: Overcoming Common PC Issues in Psychonauts 2 Gameplay
- Expert Insights Streamlining Filters Integration in Media Production for 2024
- How to Copy Contacts from Apple iPhone 7 to SIM? | Dr.fone
- How To Transfer Messages From Apple iPhone X to other iPhone All iOS Versions | Dr.fone
- How to Transfer Photos from Apple iPhone 15 Plus to other iPhone without iCloud | Dr.fone
- How to Transfer/Sync Notes from Apple iPhone SE (2020) to iPad | Dr.fone
- In 2024, How to Transfer/Sync Notes from Apple iPhone 15 Pro to iPad | Dr.fone
- Updated In 2024, From Flat to Fabulous Best Tools for Converting Videos to VR
- Title: Complete Tutorial Sending Photos From Apple iPhone 13 mini to iPad | Dr.fone
- Author: Charlotte
- Created at : 2024-10-27 21:03:44
- Updated at : 2024-10-29 20:10:19
- Link: https://iphone-transfer.techidaily.com/complete-tutorial-sending-photos-from-apple-iphone-13-mini-to-ipad-drfone-by-drfone-transfer-from-ios/
- License: This work is licensed under CC BY-NC-SA 4.0.